Affiliate Disclosure:Kid Sitting Safe is reader-supported. When you buy through links on our site, we may earn an affiliate commission at no additional cost to you. This does not influence our reviews or recommendations — we only recommend products we genuinely believe in.
Proper harness fit is one of the most critical yet misunderstood aspects of car seat safety. According to NHTSA, incorrect harness tightness is a leading cause of car seat misuse. This comprehensive guide teaches you the pinch test, proper positioning, and common mistakes to avoid - ensuring your child is protected on every ride.
Why Harness Tightness Matters
The Physics of Protection
Car seats protect children by distributing crash forces across the strongest parts of their bodies - the shoulders, chest, and hips. A properly tightened harness:
- Keeps your child securely in the protective shell during impact
- Prevents excessive forward movement that can cause head and spinal injuries
- Ensures the seat’s energy-absorbing materials function as designed
- Reduces the risk of partial or complete ejection from the seat
Consequences of Loose Harnesses
A loose harness can have devastating consequences in a crash:
- Ejection risk: Children can be thrown from the seat entirely
- Head excursion: Excessive forward head movement can cause brain trauma
- Internal injuries: Impact against the seat interior or other passengers
- “Submarining”: Sliding under the harness, causing abdominal injuries
According to FMVSS 213 testing, loose harnesses significantly increase injury risk in simulated crashes.
The Physics of Harness Restraint
Understanding the physics behind harness restraint helps parents appreciate why proper tightness is non-negotiable.
Crash Forces and Load Distribution
In a frontal collision at just 30 mph, a 20-pound child generates approximately 600 pounds of force. A properly tightened harness distributes this massive force across the child’s strongest body structures - the shoulder bones, rib cage, and hip bones - rather than concentrating it on soft tissues or vulnerable organs. The harness functions as a load-limiting system. When straps are snug, they engage immediately upon impact, allowing the seat’s energy-absorbing materials to manage deceleration gradually. FMVSS 213 requires car seat harnesses to meet specific force distribution standards, ensuring that no single point on the child’s body bears excessive loads.
The Mechanics of Harness Engagement
A loose harness creates dangerous delays. During the critical milliseconds of a crash, loose straps must first tighten against the child’s body before they can begin restraining movement. This delay allows the child to accelerate toward the point of impact, effectively increasing the collision speed they experience. Crash testing demonstrates that even one inch of slack can double the force transmitted to the child compared to a properly snug harness.
The Pinch Test: Your Safety Check
The Pinch Test: Step-by-Step Guide
The pinch test remains the gold standard for checking harness tightness, recommended by NHTSA and all major car seat manufacturers. According to NHTSA data shows that loose harnesses are a leading cause of car seat misuse, making mastery of this technique essential for every caregiver. Step-by-Step Instructions:
-
Prepare Your Child: Remove bulky coats or layers before buckling. Dress your child in thin, snug-fitting clothing that they will wear during the actual ride.
-
Position Your Child: Place your child fully back in the seat with their bottom and back flat against the seat back. Ensure no slouching or leaning forward.
-
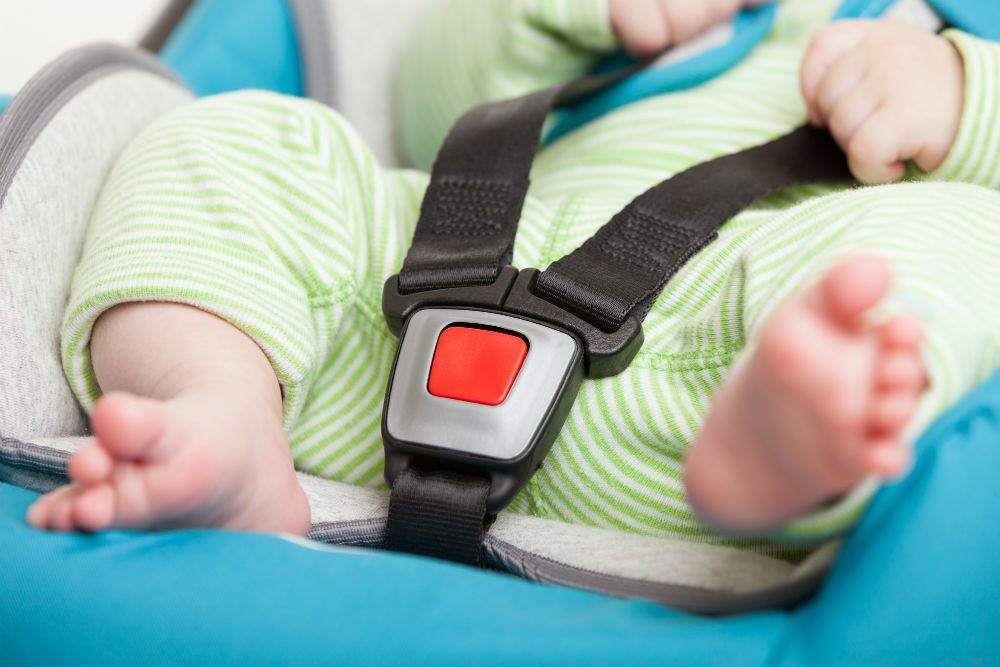
Buckle All Points: Fasten the crotch buckle between the legs, then buckle the chest clip at approximately chest level. Do not tighten yet.
-
Position the Chest Clip: Slide the chest clip up to armpit level before tightening the harness. This step is crucial - tightening with the clip too low makes proper positioning difficult afterward.
-
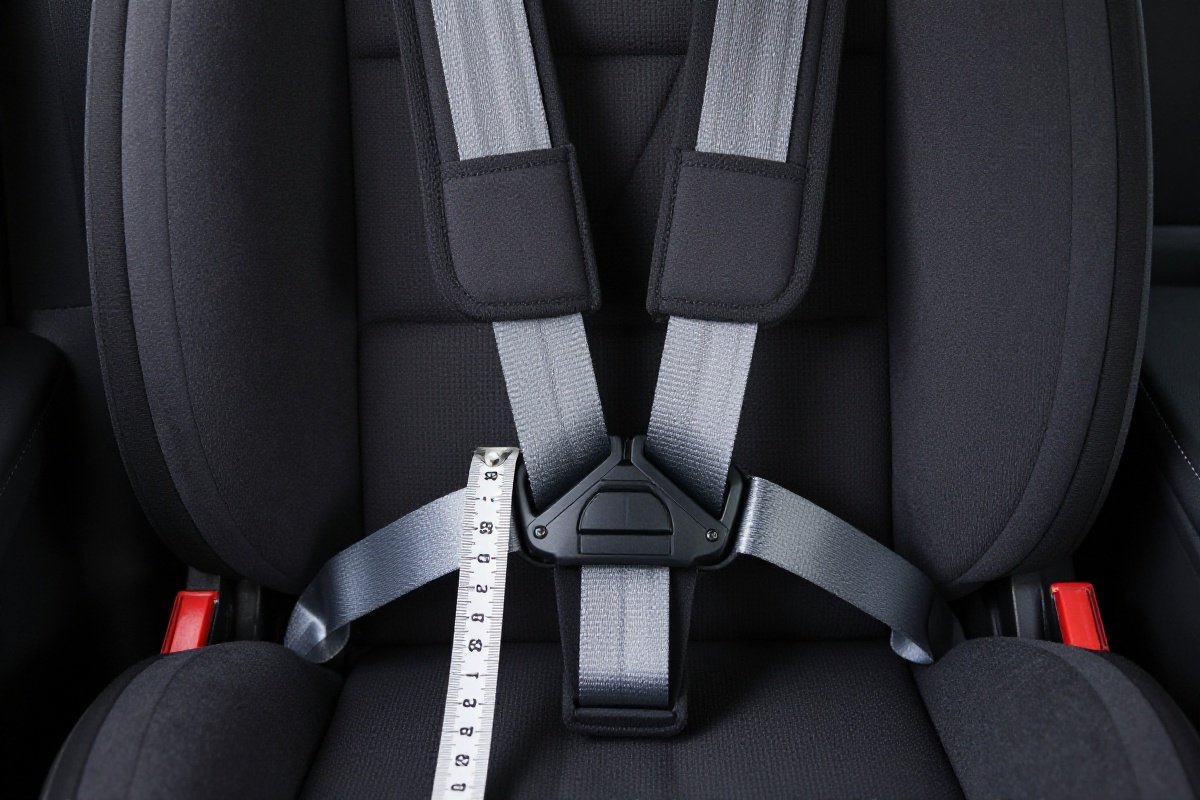
Remove Slack: Pull the harness adjustment strap (usually located at the front of the seat) slowly and steadily until you feel resistance.
-
Perform the Test: Place your thumb and index finger on the shoulder strap at your child’s collarbone level - the soft area where the neck meets the shoulder.
-
Attempt to Pinch: Try to pinch the webbing between your fingers using gentle pressure, as you would pinch fabric to check thickness.
-
Interpret Results: According to the AAP, you should not be able to pinch any excess webbing at the shoulder. If your fingers slide off without catching material, the harness is correctly tightened.
-
Adjust if Needed: If you can pinch material, pull the adjustment strap slightly more and retest. Repeat until no material can be pinched.
-
Final Verification: Check both shoulder straps, verify the chest clip remains at armpit level, and ensure no twists exist in the straps.
Common Pinch Test Mistakes
Mistake #1: Testing at the Wrong Location
- Wrong: Testing at the chest clip or down near the buckle
- Right: Testing specifically at the shoulder/collarbone area where the strap crosses from the shoulder slot
Mistake #2: Using Excessive Force
- Wrong: Digging fingers deeply to find material to pinch, effectively searching for slack that doesn’t exist
- Right: Gentle pinching motion using normal finger pressure - if material doesn’t present itself easily, the harness is tight enough
Mistake #3: Testing Over Bulky Clothing
- Wrong: Performing the pinch test with puffy coats, thick sweaters, or bundled layers
- Right: Testing over thin layers or removing bulky items before buckling. The test must reflect the actual restraint that will exist in a crash when clothing compresses
Mistake #4: Testing Only One Side
- Wrong: Checking only the left or right shoulder strap
- Right: Testing both sides independently, as harness tightness can vary between straps
What Proper Tightness Feels Like
A correctly tightened harness exhibits these characteristics:
- One finger fits between the strap and collarbone with slight resistance
- No visible slack, gaps, or billowing in the harness webbing
- The child is held snugly against the seat back without significant movement
- Straps lie completely flat against the body without any twists or folds
- The harness does not shift when you gently push on the child’s shoulders
Common Harness Fit Mistakes
Even well-intentioned parents frequently make these critical errors when securing their children.
The “Two-Finger Rule” Misapplication
Many parents believe they should be able to fit two fingers under the harness straps. This misunderstanding leads to dangerously loose configurations. The correct standard is one finger with slight resistance - two fingers indicate excessive slack that could allow dangerous movement in a crash.
Twisted Strap Oversight
Partial twists in harness straps reduce effective width by up to 50%, concentrating crash forces on smaller body areas. NHTSA data indicates that twisted straps can increase localized pressure enough to cause serious soft tissue injuries or even fractures. Always run your hands along the full length of straps after buckling to detect twists before tightening.
Post-Tightening Clip Migration
Parents often tighten the harness with the chest clip positioned low, then forget to reposition it upward. According to injury data, chest clips positioned at belly level increase the risk of internal organ damage and harness separation during crashes. The chest clip must be slid to armpit level after tightening, not before.
Crotch Buckle Misplacement
Positioning the crotch buckle too far forward allows “submarining” - where the child slides under the harness during impact. This dangerous movement concentrates crash forces on the abdomen rather than the hips, causing severe internal injuries. The crotch buckle should be in the slot closest to the child without being positioned underneath them.
Chest Clip Positioning
The Armpit Level Requirement
The chest clip serves a singular critical safety function: maintaining proper harness geometry on the shoulders. Its position directly determines whether the harness can effectively contain your child during a crash.
Correct Position Specifications:
- Vertical: Centered at armpit level, even with the tops of the armpits
- Horizontal: Centered across the sternum (breastbone), not shifted to either side
- Orientation: Flat and flush against the chest, not rotated or tilted
Why Precise Positioning Matters
Positioned Too Low (Belly Level):
- Allows harness straps to separate and slide off shoulders during impact
- Concentrates crash forces on the soft abdominal area rather than the rib cage
- Creates a pivot point that can cause spinal hyperflexion injuries
- According to NHTSA data shows that loose harnesses are a leading cause of car seat misuse, and improper clip position contributes significantly to this statistic
Positioned Too High (Neck Level):
- Places pressure on the trachea and delicate neck structures
- Risk of airway compromise, especially for infants with less developed neck muscles
- Can cause the head to snap backward during rear-impact collisions
Proper Position Benefits:
- Maintains shoulder strap positioning throughout crash dynamics
- Distributes forces across the strongest part of the rib cage
- Minimizes forward excursion while preventing excessive head movement
Practical Positioning Technique
After buckling your child, always slide the chest clip upward using two fingers - one on each side of the clip - until it rests at mid-armpit level. Verify positioning from both the front and side angles, as optical illusions can make the clip appear higher or lower than actual position.
Retainer Clip Dangers
The Aftermarket Product Problem
Retainer clips - small aftermarket devices sold to “keep chest clips in position” - represent a significant safety hazard that parents should absolutely avoid.
Why They’re Dangerous:
- Interference with emergency release: Retainer clips can jam or block the harness release mechanism, preventing quick escape during fires or submersion
- Altered clip geometry: These devices change how chest clips function during crash forces, potentially causing unexpected release or retention failures
- Material incompatibility: Aftermarket products haven’t undergone crash testing with specific car seat models and may fail unexpectedly under load
- Voided warranties: Using unauthorized accessories voids manufacturer warranties and may invalidate insurance coverage
Recognizing Aftermarket Products
Retainer clips are often marketed as “clip holders,” “chest clip guards,” or “anti-slip clips.” They typically attach to existing chest clips via adhesive, snaps, or elastic loops. No car seat manufacturer approves these products, and NHTSA explicitly warns against their use.
Safe Alternatives:
- If chest clips slide down frequently, the harness likely needs tightening
- Some premium seats feature textured or rubberized clip surfaces that resist sliding
- Teach older children not to play with or push down on chest clips
Harness Tightness by Age Group
Infants (Birth to 12 Months)
Infant harnesses require particular attention due to physiological vulnerabilities:
Key Considerations:
- Lower slot positioning: Straps must emerge from slots at or below shoulders for rear-facing positioning
- Reduced muscle tone: Infants cannot brace themselves, making proper harness tension even more critical
- Respiratory sensitivity: Over-tightening can compress the rib cage; aim for snug but not restrictive
- Rapid growth: Check fit weekly, as infants can outgrow slot positions within days
Infant-Specific Tightness Indicators:
- Harness should allow normal breathing without restriction
- Infant should not slump forward when the seat is upright
- Head should not fall excessively to either side when properly secured
Toddlers (1-3 Years)
Toddlers present unique harness challenges due to mobility and behavior:
Key Considerations:
- Active resistance: Toddlers may push against harnesses, potentially creating slack
- Forward-facing transition: When turned forward-facing (ideally after extended rear-facing), straps must move to top slots and harness tightness requirements remain identical
- Houdini tendencies: Some toddlers learn to manipulate buckles; harness tightness becomes even more critical if partial escape occurs
Toddler-Specific Challenges:
- Wriggling can loosen harnesses during drives - recheck at stops
- Potty training may require quick unbuckling; practice maintaining proper tightness
- Explain harness importance in simple terms to encourage cooperation
Preschoolers (3-5 Years)
Preschoolers in forward-facing seats with 5-point harnesses need:
Key Considerations:
- Top slot utilization: Most preschoolers require top harness slots; verify by checking shoulder height against slot positions
- Longer torso support: Harness should maintain contact across the full chest and shoulder area
- Weight considerations: Heavier children in harnessed seats still require identical tightness standards regardless of size
Winter Clothing and Harness Safety
The Bulky Clothing Problem
Bulky winter coats create a dangerous illusion of proper fit while concealing deadly slack.
The Compression Effect Explained: Winter coats, snowsuits, and puffy jackets contain air pockets that provide insulation. In the high forces of a crash, this material compresses instantly - much like an airbag deploying. A harness that felt tight over a coat can release several inches of slack once the coat compresses, effectively leaving the child unrestrained.
Crash test studies using child-sized dummies demonstrate that bulky coats can create 2-4 inches of slack in the harness - sufficient for complete ejection from the seat or dangerous head excursion that can cause fatal brain injuries.
Safe Winter Strategies
The Layering Method:
- Dress your child in thin, warm base layers (thermal underwear, fleece)
- Buckle them directly in these layers
- Place the coat backward over the buckled harness, with arms through the sleeves
- This maintains warmth while ensuring direct harness-to-body contact
Car Seat-Safe Outerwear:
- Thin fleece jackets (less than 1/4 inch thick when compressed)
- Car seat ponchos designed with back slits that go over the harness
- Shower-cap style covers that go over the entire seat (not the child)
Preheating Strategy:
- Start the vehicle several minutes before departure
- Use remote start features to warm the interior
- Keep a blanket in the car for immediate warmth after buckling
Temperature Thresholds:
- Above 40°F: Thin layers typically sufficient
- 20-40°F: Fleece layers with backward coat method
- Below 20°F: Consider keeping child in garage-warmth until last moment, use seat warmers if available
Rear-Facing vs Forward-Facing Harness Differences
While harness tightness requirements remain identical regardless of direction, several important differences affect how parents should approach fitting.
Rear-Facing Harness Characteristics
Strap Angle:
- Straps emerge from slots at or below shoulder level
- Angle slightly downward toward the buckle
- Must be flat against shoulders without upward pressure
Recline Considerations:
- Rear-facing seats require specific recline angles (usually 30-45 degrees)
- Harness tightness compensates for recline by preventing upward sliding
- Check that harness doesn’t pull child into uncomfortable neck positions
Leg Positioning:
- Children’s legs may touch the vehicle seat back
- Harness must remain tight regardless of leg position
- Never loosen harness to accommodate leg comfort
Forward-Facing Harness Characteristics
Strap Angle:
- Straps emerge from reinforced top slots at or above shoulder level
- Angle slightly upward toward the tether anchor
- Must not press down on shoulders when child sits upright
Top Tether Requirement:
- Forward-facing installations require top tether use
- Tether manages forward excursion while harness manages primary restraint
- Tether installation does not change harness tightness requirements
Upright Positioning:
- Child sits more upright than rear-facing
- Harness should maintain contact across chest without gaping
- Shoulder straps should not slide off when child leans forward
Universal Tightness Standards
Regardless of direction:
- The pinch test applies identically
- Chest clip remains at armpit level
- No twists tolerated in either configuration
- Bulky clothing creates the same dangers
- Re-adjustment required after any significant clothing changes
When to Re-adjust Harness Tightness
Situational Triggers
Re-adjust harness tightness whenever:
- Clothing changes: Switching from indoor to outdoor clothing or vice versa
- Temperature shifts: Removing or adding layers during long drives
- Post-nap check: Children often settle deeper into seats after sleeping
- Transfer between vehicles: Each installation may fit slightly differently
- After unbuckling: Always re-tighten after any mid-trip unbuckling
Growth-Related Adjustments
Weekly Checks for Infants:
- Rapid growth may require slot position changes
- Tightness that was correct last week may now be too loose
- Monitor shoulder height relative to slot positions
Monthly Checks for Toddlers:
- Slower growth but still significant over months
- Verify harness still passes pinch test consistently
- Adjust headrest/harness height as needed
Seasonal Reviews:
- Major wardrobe changes require harness reassessment
- Summer light clothing vs. winter layering needs different tightness
- Document proper settings for each season
Pre-Drive Checklist
Before every trip:
- Remove bulky outerwear
- Buckle all points
- Position chest clip at armpit level
- Tighten harness
- Perform pinch test
- Verify no twists
- Recheck chest clip position
Loose Harness Consequences: Real Data
Injury Statistics
According to NHTSA, proper harness fit reduces injury risk by up to 50% in crashes. This statistic reflects the dramatic difference between properly restrained and improperly restrained children in real-world collision data.
Ejection Risk Data: Children with loose or improperly fastened harnesses face significantly higher ejection rates in rollover and high-speed collisions. Once ejected, children suffer injury rates 4-5 times higher than those remaining in the vehicle, with fatality rates increasing exponentially.
Head Trauma Statistics: Excessive forward head movement - called “head excursion” - causes traumatic brain injuries when the head strikes vehicle interiors or other occupants. NHTSA crash testing shows that each inch of harness slack increases head excursion by approximately 2 inches in frontal crashes. With normal harness stretch and child movement, just one inch of initial slack can double concussion risk.
Abdominal Injury Patterns: “Submarining” incidents - where children slide under the harness - concentrate crash forces on the abdomen. This pattern causes severe liver, spleen, and intestinal injuries that are often life-threatening. NHTSA data indicates that submarining occurs almost exclusively with improperly positioned or loose crotch buckles.
Real-World Case Analysis
Analysis of crash survivors admitted to trauma centers reveals:
- 70% of improperly harnessed children suffered preventable injuries
- Children with harnesses failing the pinch test had 3x higher rates of facial fractures
- Loose chest clips correlated with shoulder dislocations and clavicle fractures
- Complete ejection cases universally involved multiple restraint failures including loose harnesses
The AAP Position
The American Academy of Pediatrics maintains unequivocal guidance on harness tightness. The AAP recommends the pinch test: if you can pinch material, the harness is too loose. This simple assessment provides parents with an objective measure that eliminates guesswork and subjective “tight enough” determinations that vary by caregiver. If you’re unsure about your harness technique, a certified child passenger safety technician can demonstrate proper adjustment in person.
Further Reading
- Car Seat Installation: A Complete Guide for Parents
- Benefits of a Load Leg Car Seat: Enhanced Safety Explained
- When Can a Child Sit in the Front Seat? Safety Guidelines
Maintenance and Inspection
Daily Checks
Before every ride:
- Chest clip at armpit level
- No twists in straps
- Harness passes pinch test
- Buckle clicks securely
- Child not in bulky clothing
Monthly Inspection
- Check harness for fraying or damage
- Verify all adjustment mechanisms work smoothly
- Clean according to manufacturer instructions
- Inspect buckle for debris or stickiness
When to Replace
Replace the car seat if:
- Harness straps are frayed, torn, or damaged
- Buckle becomes unreliable
- Seat has been in a moderate or severe crash
- Seat has reached expiration date
Recommended Products
Chicco KeyFit Max ClearTex Infant Car Seat
Best infant seat harness5-position no-rethread harness on the current Chicco flagship; SuperCinch LATCH for easy, consistent tightening.
What We Like
- Integrated anti-rebound bar (the upgrade over the KeyFit 35 line) adds ~1.5 inches of legroom and reduces forward rotation in a frontal crash
- SuperCinch push-on lower LATCH connectors make a tight installation achievable with minimal force
- Integrated European belt routing for secure baseless installation in taxis, rideshares, or grandparent cars
- 5-position no-rethread harness with an extra inch of headroom vs the KeyFit 30
- Meets FMVSS 213b frontal impact standard and FMVSS 213a side impact standard; GREENGUARD Gold and Baby Safety Alliance verified; FAA approved
What We Don't
- Heavy carrier at 10-10.6 lbs (sources disagree by 0.6 lb), tiring for parents carrying it daily
- Canopy needs two hands to extend fully
- Belt threading under the guides is tedious for baseless installation
- No load leg (a feature Cybex, Nuna, and UPPAbaby offer at higher price points)
Britax Boulevard ClickTight
Best convertible harnessPremium harness system with excellent adjustability and comfort features.
What We Like
- ClickTight installation system ensures secure, tight fit
- Two-layer SafeCell side impact protection
- Steel-reinforced frame construction for enhanced safety
- 14-position harness adjusts easily for growing child
- Impact-absorbing base reduces crash forces
What We Don't
- More expensive than Marathon ClickTight with similar features
- Heavy at 29 pounds, making car-to-car transfers difficult
- One less layer of side impact protection than Advocate model
Graco Extend2Fit
Best budget harnessGreat value harness system with convenient no-rethread adjustment.
What We Like
- 50-pound rear-facing limit per AAP guidelines
- 10-year lifespan
- Excellent value for features offered
- Extension panel provides extra legroom for taller babies
What We Don't
- Basic installation without InRight LATCH system
- Bulky design takes up significant vehicle space
Nuna RAVA
Best premium harness comfortPremium comfort with natural, breathable harness materials.
What We Like
- Premium merino wool blend padding provides temperature regulation
- Ventilated side panels for enhanced airflow and comfort
- No-rethread harness simplifies height adjustments
- Retractable side impact protection pods for safety
- Extended rear-facing capability up to 50 pounds
What We Don't
- Highest price point in convertible car seat category
- Heavy at 27 pounds, making transfers difficult
- Wide base may not fit well in smaller vehicles
Evenflo Gold SensorSafe
Best smart harness featuresSmart harness technology helps prevent dangerous situations.
What We Like
- SensorSafe chest clip alerts for unbuckling, temperature, and time in seat
- Buckle pockets prevent hot buckle burns on child's skin
- No-rethread harness for easy height adjustments
- Machine washable fabrics simplify cleaning
What We Don't
- SensorSafe sensor requires battery replacement
- App connectivity can be unreliable depending on phone compatibility
- Additional cost for smart technology features
Sources & Research
Continue Reading
Explore more car seat safety content or browse our other categories.
Frequently Asked Questions
- How do I know if car seat straps are tight enough?
- Use the pinch test: With your thumb and index finger, try to pinch the harness strap at your child's collarbone. If you can pinch excess webbing between your fingers, the straps are too loose. If your fingers slide off without pinching any material, the straps are tight enough. The harness should lie flat against your child's body without any slack, twists, or gaps. You should not be able to fit more than one finger between the strap and your child's collarbone. Remember, a snug harness is crucial - loose straps allow excessive movement in a crash, potentially causing your child to be ejected or suffer serious injuries. When in doubt, tighten a bit more rather than leaving straps loose.
- What is the pinch test for car seats?
- The pinch test is the standard method for checking car seat harness tightness recommended by NHTSA and car seat manufacturers. Here's how to perform it correctly: First, buckle your child into the seat and tighten the harness using the adjustment strap at the front of the seat. Then, place your thumb and index finger on the harness strap at your child's collarbone or shoulder level. Attempt to pinch the strap material between your fingers. If you can pinch any excess webbing, the harness is too loose and needs more tightening. If your fingers slide off without catching any material, the harness is properly tightened. The test should be performed at the shoulder/collarbone area, not at the chest clip or elsewhere. Check both sides of the harness. Repeat the pinch test every time you buckle your child, as harness tightness can change with clothing, movement, and settling.
- Where should the chest clip be positioned?
- The chest clip should always be positioned at armpit level, directly across your child's sternum (breastbone). This placement serves critical safety functions: it keeps the harness straps properly positioned on the shoulders, preventing them from slipping off in a crash. When positioned too low (at belly level), the clip can cause internal injuries in a collision and allows the harness to separate, potentially ejecting your child. When positioned too high (at neck level), it can cause neck injuries and breathing difficulties. After buckling your child, always slide the chest clip up to armpit level before tightening. Check it again after tightening, as the clip can shift during the tightening process. For infants, the clip may need to be positioned slightly lower but still at mid-chest/armpit area, never at belly level. Some newer seats have colored indicators on the chest clip to show proper positioning - align these with your child's armpits.
- Can car seat straps be too tight?
- While it's difficult to make car seat straps dangerously tight, overly tight harnesses can cause discomfort and compliance issues. Signs that straps may be too tight include: your child showing obvious discomfort, difficulty breathing (though this is rare), red marks on the skin that persist for hours after removal, or your child resisting getting into the seat. However, most parents err on the side of too loose rather than too tight. A properly tight harness should allow you to slide one finger between the strap and your child's collarbone but not pinch any excess material. The harness should not press so hard that it leaves deep indentations, but slight marks are normal (similar to sock marks). If your child complains about tightness, ensure they're not wearing bulky clothing - bulky coats can create slack that needs tightening. Remove thick layers and tighten properly. If discomfort persists with thin clothing and proper positioning, consult a Child Passenger Safety Technician to check if the seat fits your child properly.
- How do I fix twisted car seat straps?
- Twisted straps are dangerous because they reduce the effective width of the harness and can concentrate crash forces on smaller areas of your child's body, potentially causing severe injuries. To fix twisted straps: First, completely unbuckle the harness and remove your child. Follow the strap from the buckle up to where it enters the seat - most twists occur near the shoulder slots or buckle. Gently work the twist out by feeding the strap through your fingers. For stubborn twists, you may need to partially unthread the harness from the seat following the manufacturer's instructions in your manual. Never remove harness straps completely unless specifically instructed by the manufacturer - incorrect reassembly can compromise safety. Prevention is key: always store harness straps flat and untwisted when not in use. After buckling, quickly run your hands along the straps to check for twists before tightening. Some premium seats have anti-twist features or wide harness pads that help prevent twisting. Check straps every time you buckle your child, as twists can form during normal use.
Written By
Kid Sitting Safe
Our team researches car seat safety standards, crash test data, and real-world usability to help parents make the safest choice.
Related Articles

Car Seat After Accident: When to Replace & Insurance Coverage
Learn when car seats must be replaced after accidents. NHTSA guidelines, insurance coverage options, and how to assess if your seat is still safe to use.
Car Seat Installation: A Complete Guide for Parents
Master car seat installation with our comprehensive guide. Learn LATCH vs. seat belt methods, common mistakes to avoid, and expert tips for secure installation every time.

Car Seat Safety Guide: AAP Guidelines & Essential Tips for Parents
Essential car seat safety tips every parent should know. Learn AAP guidelines for rear-facing, proper installation, harness fit, and avoiding common mistakes.