
Affiliate Disclosure:Kid Sitting Safe is reader-supported. When you buy through links on our site, we may earn an affiliate commission at no additional cost to you. This does not influence our reviews or recommendations — we only recommend products we genuinely believe in.
Family travel creates lasting memories, but it also presents unique challenges. From packing efficiently to navigating airports with young children, preparation is key to successful family adventures. This comprehensive guide covers everything you need to know for smooth travels with kids of all ages.
Planning Your Trip
Choosing Destinations
Age-Appropriate Considerations:
| Age | Best Destinations | Challenges |
|---|---|---|
| 0-12 months | Beach resorts, cruises | Feeding schedules, sleep needs |
| 1-3 years | All-inclusive resorts, family camps | Mobility, safety concerns |
| 4-7 years | Theme parks, nature lodges | Stamina, attention span |
| 8+ years | Adventure travel, cultural sites | Varied interests |
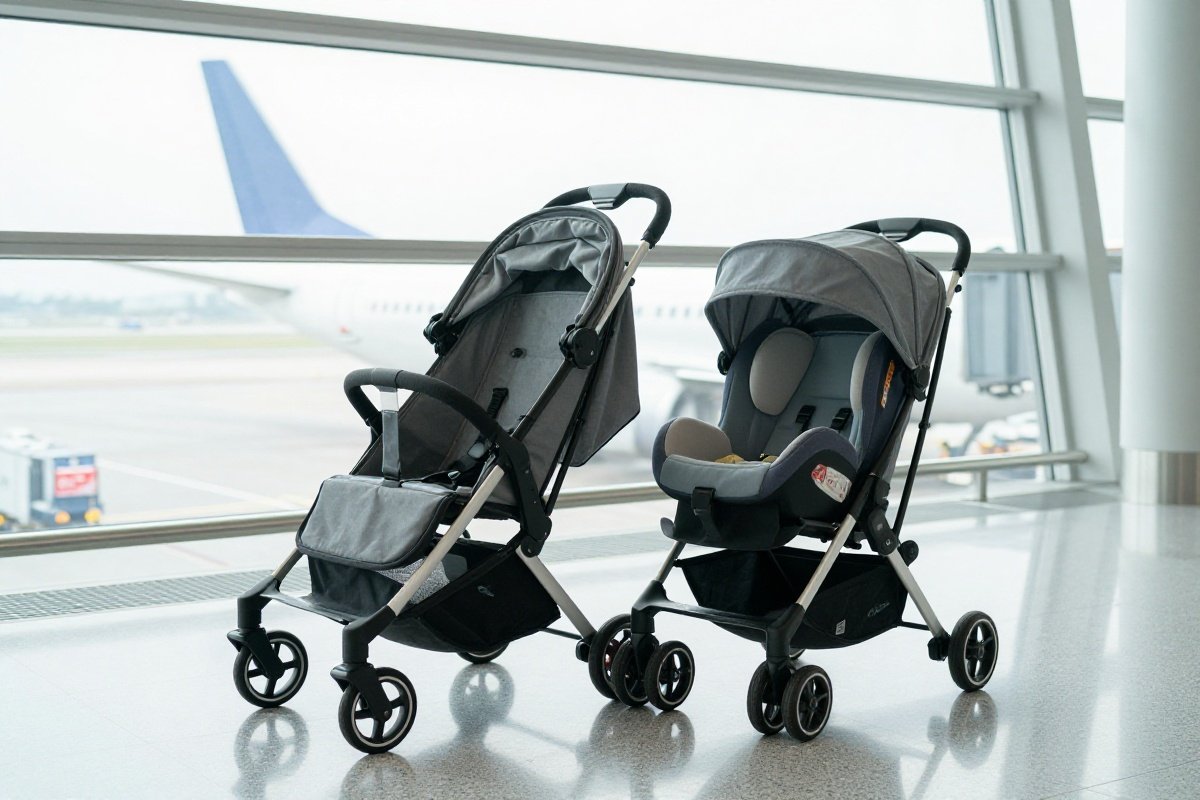
When selecting your destination, consider the infrastructure available for families. Look for accommodations with laundry facilities, kitchenettes for preparing familiar foods, and pools or play areas where kids can burn energy. Research whether your destination requires extensive walking (which can be exhausting for little legs) or if stroller access is limited due to cobblestones or stairs.
Climate considerations matter significantly more when traveling with children. Extreme heat or cold creates additional challenges with hydration, sun protection, and appropriate clothing. Destinations with moderate, predictable weather often prove easier for first-time family travelers.
Travel time and connections should factor heavily into your decision. Direct flights, while potentially more expensive, eliminate the stress of rushing through airports with children and all your gear. For international travel, consider destinations within a single time zone change for your first trips to ease jet lag adjustments.
Budget Planning
Family travel expenses multiply quickly. Beyond transportation and accommodation, factor in:
- Meal costs: Restaurant meals for a family add up fast. Consider accommodations with kitchen facilities.
- Activity expenses: Entrance fees, tours, and experiences often charge per person, including children over certain ages.
- Gear rentals: Car seats, strollers, cribs, and beach equipment at your destination versus bringing your own.
- Emergency buffer: Always budget 20-30% extra for unexpected costs like pharmacy runs, last-minute childcare, or damaged luggage.
Timing Your Travel
Best Times:
- Shoulder seasons (lower crowds, better prices)
- During school breaks (if school-age)
- Off-peak flight times
- Nap times for younger children
Avoid:
- Red-eye flights with young children
- Peak holiday crowds
- Extreme weather seasons
Flight timing requires strategic thinking beyond just finding the cheapest fare. Morning flights often experience fewer delays and mean starting your vacation day fresh. Late morning departures (10 AM - 12 PM) allow for normal morning routines without rushing, though you’ll arrive at your destination in the afternoon.
Nap-time flights work beautifully for toddlers and preschoolers if you can time it right. A 1-2 PM departure might align perfectly with their usual nap schedule, meaning they’ll sleep through much of the flight. However, this strategy backfires if they’re too stimulated by the airport excitement to actually sleep.
Consider your arrival time at the destination. Landing in the early evening allows you to get to your accommodation, do a quick dinner, and get kids to bed on schedule. Mid-afternoon arrivals give you time to settle in and explore the immediate area. Very late arrivals mean exhausted, cranky children trying to navigate a new place in the dark.
Packing Strategies
The Ziplock Method
Pack complete outfits in individual bags:
- One bag = one full outfit
- Protects from spills
- Easy to grab and go
- Compresses clothing
This method transforms how you pack. Instead of digging through a suitcase to find matching socks or that specific shirt, you grab one bag and have everything needed. Label each bag with the day or occasion (“Beach Day 1” or “Tuesday”) using a permanent marker.
For younger children, include underwear, socks, and a hair accessory in each bag. For babies and toddlers, add a bib and a backup onesie. The slight redundancy ensures you’re truly grabbing one bag and going, even when you’re frazzled in a hotel room with a toddler melting down.
The compression benefit shouldn’t be overlooked. As you place folded clothes in the ziplock, press out the air before sealing. This creates vacuum-sealed packages that maximize suitcase space and keep clothes wrinkle-free.
Carry-On Essentials
Must-Haves:
- Change of clothes for everyone
- Diapers/wipes (more than you think)
- Snacks (non-perishable)
- Medications
- Entertainment
- Chargers
- Important documents
Expand this list based on your specific needs. For babies, include at least two extra pacifiers if your child uses them - they have an uncanny ability to disappear at critical moments. Pack formula or breast milk in appropriate quantities, remembering that TSA allows these in reasonable amounts even beyond the standard 3.4-ounce limit.
Wet bags (used for cloth diapers) are invaluable for soiled clothing or swimsuits. Pack at least two: one for immediate use and a backup. They contain messes and odors effectively, preventing one accident from ruining your entire bag’s contents.
Hand sanitizer and disinfecting wipes deserve prominent placement in your carry-on. Airplane tray tables, armrests, and seat belt buckles harbor surprising amounts of germs. A quick wipe-down before kids touch surfaces provides peace of mind.
Consider a small blanket or large muslin swaddle. These versatile items serve as nursing covers, sun shields over strollers, makeshift changing pads, or comfort objects for anxious children in unfamiliar environments.
Packing Cubes
Organize by:
- Family member
- Clothing type
- Day of trip
- Activity
Assign each family member a color-coded set of packing cubes. This system prevents the inevitable “That’s my shirt!” arguments and allows older children to manage their own belongings. Even preschoolers can identify their blue cubes versus sibling’s red ones.
Create an activity-specific cube for special occasions or activities. Swimming gear (suits, goggles, rash guards, swim diapers) stays together in one cube. Formal dinner outfits occupy another. This prevents scattering specialized items across multiple bags.
Compression cubes work exceptionally well for bulky items like jackets and pajamas. The compression zippers reduce volume by 40-60%, creating significant extra space in your luggage.
The “Last In, First Out” Packing Principle
Pack items you’ll need immediately at your destination on top or in easily accessible pockets. This typically includes:
- Pajamas for first night
- Toiletries for bedtime routine
- Phone chargers
- Snacks for the ride from airport/station
- A comfort toy or lovey for each child
Nothing tests patience like unpacking an entire suitcase in a hotel room at 10 PM with overtired children just to find toothbrushes.
Airport Survival
Check-In Strategy
Online Check-In:
- 24 hours before domestic
- Select seats together
- Review TSA guidelines
At the Airport:
- Arrive 2+ hours early with kids
- Use family lanes at security
- Request TSA assistance if needed
Airport arrival time with children requires more buffer than solo travel. Three hours for international flights and two hours for domestic should be your baseline. This accounts for longer security lines (families typically take more time), bathroom emergencies, and the inevitable forgotten item that requires returning to the car.
Priority boarding offered by many airlines is worth utilizing with young children, even if it costs extra. You’ll have overhead bin space, time to get settled without blocking other passengers, and can organize your area before the chaos of general boarding begins.
Gate selection matters more than you might think. Gates near playgrounds or children’s areas allow kids to burn energy before boarding. Gates with nearby family bathrooms save you from navigating crowded single-stall options.
Pre-Security Planning
Let kids participate in the airport experience in age-appropriate ways. School-age children can pull their own luggage - options like the Trunki Ride-On Suitcase make this both functional and fun. Older kids can help navigate the airport using terminal maps or apps, giving them a sense of responsibility and investment. Bathroom strategy before security is crucial. Even if children claim they don’t need to go, have everyone try. The security line is no place to discover urgency. Identify family or companion bathrooms near your airline’s check-in area - these provide space for multiple family members and extra room for luggage.
Last-minute purchases should be planned. If you need to buy water or snacks post-security, discuss this with kids beforehand. Unexpected demands in airport shops (“But I want that toy!”) create unnecessary stress. Set expectations: “We’ll get one snack each after security, and you can choose from these three options.”
TSA with Kids
What to Know:
- Children under 12 can keep shoes on
- Breast milk/formula exempt from liquid rules
- Strollers gate-check free
- Car seats can be gate-checked or used on plane
Tips:
- Have liquids easily accessible
- Prepare kids for security process
- Allow extra time
Explain the process to children before you reach security. Use simple terms: “We’ll put our bags on a moving belt. They’ll go through a machine that takes pictures. We’ll walk through a doorway. Sometimes they might wave a wand near us or ask us to step aside for a gentle pat-down. Everyone’s bags and bodies get checked - it’s not because we did anything wrong.”
For children with sensory sensitivities or autism, TSA offers Notification Cards you can print from their website. These cards allow you to discreetly inform officers about your child’s needs without verbal announcement. TSA Cares (855-787-2227) is a helpline you can call 72 hours before travel to arrange for additional assistance.
Medication and medical equipment should be clearly labeled and declared at the beginning of screening. This includes EpiPens, inhalers, diabetes supplies, and any prescription medications. Keep these in clear, labeled bags with prescription information visible.
Baby gear creates additional screening steps. Strollers must be collapsed and sent through X-ray machines (remove children first). Baby carriers can typically stay on your body during screening. Car seats are treated as luggage - they can be gate-checked with protective bags like the J.L. Childress Car Seat Bag or brought on the plane if you’ve purchased a seat.
In-Flight Strategies
Seat Selection
Best Options:
- Bulkhead (more legroom, bassinet option)
- Window (kids can look out)
- Rear of plane (near bathrooms, less crowded)
- Seats together (obviously)
Bulkhead rows provide the most space but come with tradeoffs. The extra legroom is wonderful for diaper changes or letting toddlers stand. However, all bags must be stowed overhead during takeoff and landing (no underseat storage), and tray tables fold out from armrests, which reduces seat width slightly.
Window seats keep children contained - they can’t wander into the aisle, and they have the window entertainment. The downside? You’ll climb over others for bathroom trips. If traveling with two adults and one child, consider the window and aisle configuration, leaving the middle empty. On less-full flights, this middle seat often remains vacant, giving your family extra space.
Aisle seats work better for active children who need frequent movement or bathroom access. You can easily stand up, walk the aisles, or quickly respond to needs without disturbing other passengers.
Rear-of-plane seats receive unfair criticism. Yes, they’re near lavatories, but this proximity is a blessing with children. You’re also near flight attendants and their supplies. These seats often board last, meaning less time confined to seats before takeoff. The main drawback? You’ll wait longer to deplane.
Pre-Boarding Considerations
Not all families should pre-board. Infants and young toddlers benefit from boarding early - you need time to settle in, organize supplies, and get comfortable. Energetic preschoolers and school-age children might be better served by burning energy at the gate until the last possible moment. More time on the plane equals more time confined.
Entertainment Arsenal
Screen-Free Options:
- Sticker books
- Water Wow pads
- Small toys (wrapped individually)
- Crayons and paper
- Books
Screen Time:
- Download content offline
- Bring headphones
- Charge everything fully
- Portable charger essential
The “new toy” strategy works remarkably well. Visit a dollar store before your trip and select 5-10 small, age-appropriate toys. Wrap each one individually in tissue paper or brown paper bags. Hand out one wrapped toy per hour or as needed. The unwrapping process itself provides entertainment, and the novelty factor keeps attention longer than familiar toys.
Magnetic activities are superior to loose pieces on airplanes. Magnetic drawing boards, magnetic dress-up dolls, and magnetic puzzle boards keep pieces contained. Nothing’s worse than watching crayons roll down the aisle or searching under seats for puzzle pieces.
Audio entertainment offers a middle ground between screens and complete silence. Audiobooks, story podcasts designed for children, or music playlists on devices like an iPad Mini with Case provide engagement without the passive screen time concerns. Children’s podcasts like “Story Pirates,” “Wow in the World,” or “Circle Round” captivate kids for extended periods.
Activity timing requires strategy. Don’t deploy your best entertainment options immediately. Start with simpler activities - coloring, books, looking out the window. Save the exciting new toys and screen time for when restlessness peaks, typically 45-60 minutes into the flight.
Snack Strategy
Best Travel Snacks:
- Cheerios/puffs (take time to eat)
- String cheese
- Granola bars
- Fruit leather
- Crackers
- Empty sippy cups (fill after security)
Snacks serve dual purposes: nutrition and time-killing. Small, individually-wrapped items that require opening extend eating time. Individual pretzel packs, small cheese cubes, or wrapped crackers keep hands and mouths busy longer than large containers of snacks.
Avoid messy or strongly scented foods. Chocolate melts. Bananas smell. Anything crumbly creates messes in seats that you’ll sit in for hours. Yogurt tubes sound healthy but require careful handling to prevent explosions.
Novel treats maintain their effectiveness throughout the flight. Save special snacks - things your children don’t regularly eat at home - for airplane time. That organic fruit pouch becomes significantly more exciting at 30,000 feet when it’s a rare treat.
Hydration matters more than you might realize. Airplane cabin air is extremely dry. Encourage regular water intake, especially for children prone to ear pain during descent. The swallowing action helps equalize ear pressure.
Managing Air Pressure and Ear Pain
Ear pain during takeoff and landing affects many children. Nursing or bottle-feeding during ascent and descent helps infants. The sucking and swallowing naturally equalizes pressure.
For toddlers and older children, lollipops, gum (if age-appropriate), or drinks with straws encourage swallowing. Start the process as the plane begins descent, not when pain already exists.
The Valsalva maneuver - pinching the nose closed and gently blowing - helps equalize pressure. Demonstrate this to children old enough to understand (typically 4+). Make it playful: “Let’s blow up a pretend balloon in our ears!”
If a child has a cold or congestion, consult your pediatrician before flying. Clogged sinuses make pressure equalization difficult and painful. Pediatric decongestants, when recommended by your doctor, can prevent significant discomfort.
Road Trip Tips
Vehicle Preparation
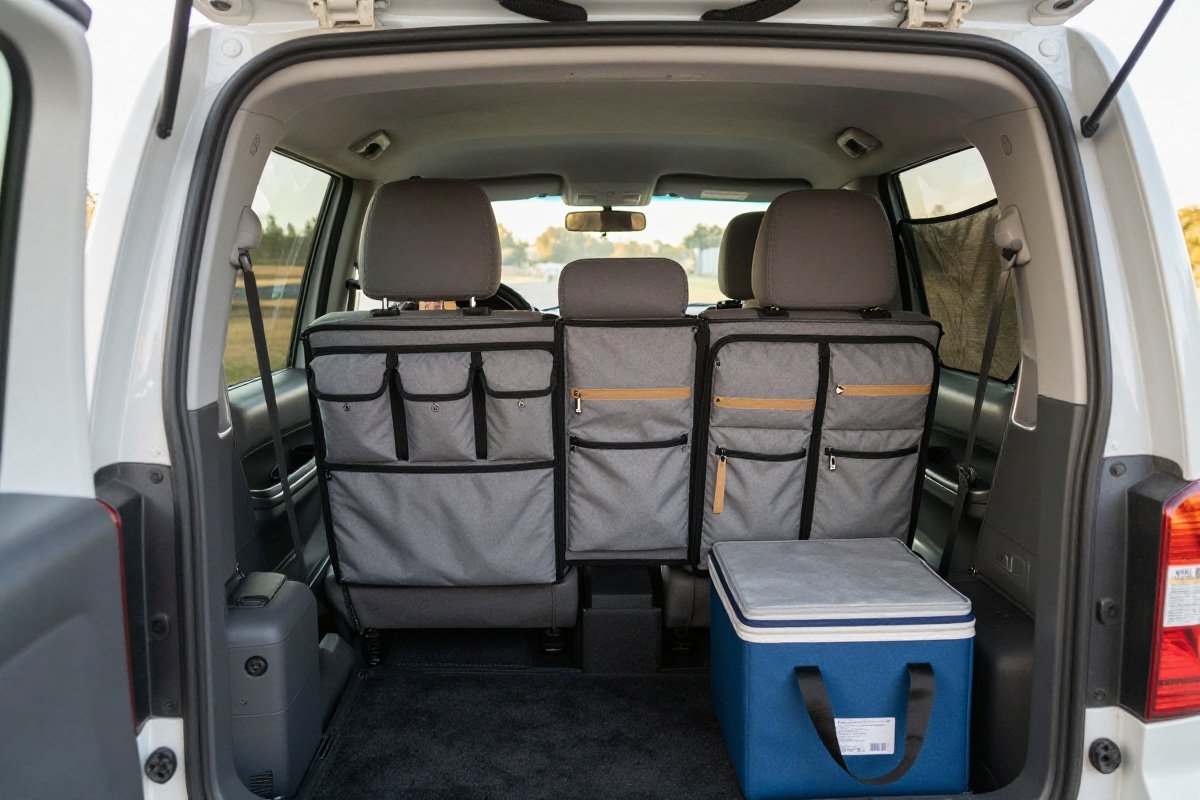
Before You Go:
- Service/check vehicle
- Check car seat installations
- Pack emergency kit
- Plan route with stops
Every 2 Hours:
- Stop for movement
- Bathroom break
- Snack time
- Change drivers if possible
A pre-trip vehicle inspection prevents roadside disasters. Check tire pressure (including spare), fluid levels, battery condition, and brake function. Replace worn windshield wipers - you don’t want to discover poor visibility during a rainstorm with kids in the car.
Entertainment setup before departure saves miles of whining. Install tablet holders, organize activity bags, arrange toys within reach, and test all technology. Discovering dead batteries or missing chargers on the highway creates unnecessary frustration.
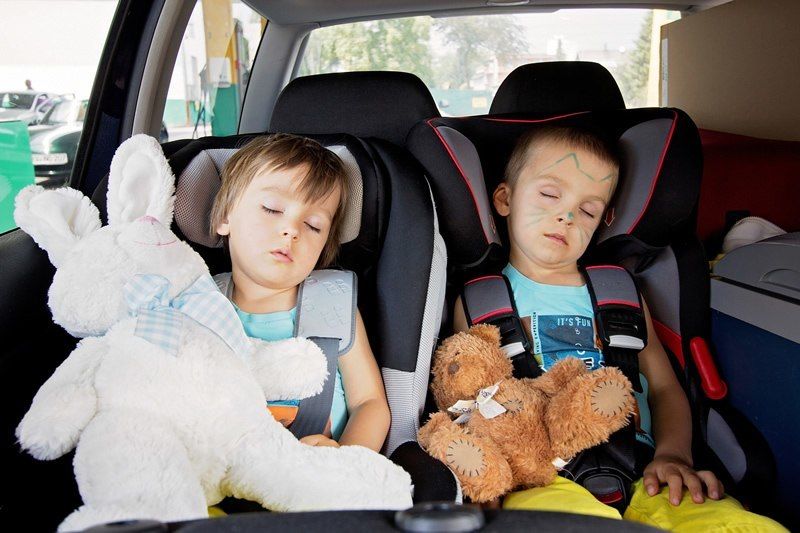
Seating arrangements significantly impact trip harmony. Separate children prone to fighting. Place the child most likely to need assistance (youngest, most prone to car sickness) in the most accessible seat. If you have three across, consider which child can handle being in the middle with limited window access.
Car Activities
Engagement Ideas:
- Audiobooks/podcasts
- Road trip bingo
- I Spy
- License plate game
- Activity trays
Lap desks or car activity trays transform how children occupy themselves. These stable surfaces allow for coloring, stickers, play with small toys, or snack containment. Look for trays with cup holders and storage compartments built in.
The “mile marker game” engages elementary-age children with minimal preparation. Each child selects a number (0-9). As you pass mile markers, whoever’s number appears wins a point. This encourages reading practice, math skills, and gives children something to watch for during monotonous highway stretches.
Story building as a family creates collaborative entertainment. One person starts a story with a single sentence. The next person adds a sentence, continuing the story. This continues around the car, creating increasingly absurd and entertaining tales. Record these on your phone - they become treasured memories.
Silent time isn’t punishment; it’s strategy. After periods of high-energy activities or games, institute 20-30 minutes of quiet time. Children can look at books, color quietly, or simply rest. This prevents everyone from becoming overstimulated and cranky.
Motion Sickness Prevention
Seating position affects motion sickness likelihood. Children in rear-facing car seats experience more motion sickness due to their orientation. Once forward-facing, window seats with clear views of the horizon reduce symptoms compared to middle seats.
Visual focus on the horizon or distant objects helps more than books or screens. If a child is prone to car sickness, save screens and reading for rest stops, not moving vehicle time.
Fresh air through cracked windows and maintaining moderate temperatures (not too hot) reduces nausea. Avoid strong scents in the car - air fresheners, perfumes, or pungent foods can trigger or worsen symptoms.
Ginger in various forms (ginger ale, ginger candies, ginger cookies) naturally settles stomachs. Keep these easily accessible. For children with severe motion sickness, consult your pediatrician about appropriate medications before your trip.
The Strategic Stop Schedule
Every 90-120 minutes should be your baseline for stops with young children, extending to 2-3 hours with older kids who can better communicate needs. Look for rest stops or fast-food restaurants with outdoor playgrounds when possible.
Build in “destination stops” - interesting places along your route that turn necessary breaks into mini-adventures. Quirky roadside attractions, scenic overlooks, state welcome centers with exhibits, or small-town parks transform obligatory stops into highlight memories.
Time your stops with meals whenever possible. Sit-down restaurant meals provide extended breaks, allowing children to move around and reset before returning to the car. Pack a picnic and find a park for even more movement opportunities.
Accommodation Tips
Room Setup
Request:
- Crib/pack-n-play if needed
- Refrigerator for milk/medicine
- High floor for quiet (if no balcony risk)
- Connecting rooms for larger families
Call ahead to confirm availability of requested items, even if you selected them during booking. Hotels oversell cribs, and you don’t want to arrive exhausted to discover none are available. Confirm the specific room numbers if you’ve booked connecting rooms - sometimes “connecting” means “adjacent” rather than “interior door between rooms.”
Ground floor rooms offer advantages: easy access for frequent outdoor trips, no stairs to navigate with sleeping children, and reduced concern about noise complaints from children running or jumping. However, they may be noisier (parking lot sounds, other guests walking past windows) and present greater security concerns.
Suite configurations or rooms with separate sleeping areas are worth the investment. When children sleep in a separate room or behind a partition, adults gain precious evening hours for conversation, work, or relaxation without hotel hallway exile.
Baby-Proofing on the Go
Bring:
- Outlet covers
- Painter’s tape (cord management)
- Toilet lock (if toddler)
- Nightlight
The 15-minute baby-proofing routine upon arrival protects children and preserves your security deposit. Scan the room at child eye level. Move breakables, cover outlets, tape down cords, and secure bathroom items. Place the TV remote out of reach (hotels charge surprising amounts for lost remotes).
Furniture anchoring in hotels is impossible, but you can create barriers. Push tall furniture against walls, move chairs to block access to windows, and rearrange to create a safe play space. Inform hotel staff immediately if you discover genuine safety hazards - unsecured furniture, broken locks, or exposed wires.
Sleep environment setup as close to home conditions as possible eases transitions. Bring your children’s usual nightlight, sound machine, or comfort items. Cover bright alarm clocks or electronics with washcloths. Maintain bedtime routines as consistently as possible despite the new environment.
Hotel Meal Strategies
Book rooms with kitchenettes when possible, even if you plan to eat out most meals. The ability to prepare breakfast, store leftovers, and have snacks readily available saves money and provides fallback options when restaurant meals go wrong.
Grocery delivery services or quick supermarket runs upon arrival stock your room with essentials: milk, cereal, fruit, sandwich supplies, and familiar snacks. This proves invaluable for early morning starts, late-night snack requests, or days when leaving the room feels impossible.
Request extra coffee makers, microwaves, or mini-fridges if your room doesn’t include them. Many hotels provide these items free upon request but don’t advertise their availability.
Destination Preparation
Research Before You Go
Essential Info:
- Pediatric urgent care locations
- Pharmacy locations
- Kid-friendly restaurants
- Playground/park locations
- Emergency numbers
Create a digital reference sheet accessible offline with this essential information. Include addresses, phone numbers, and hours of operation. Share this document with all adults in your travel party. Nothing increases stress like searching for urgent care with a sick child and spotty phone service.
Identify “safe base” locations near your accommodation - places you can easily reach if plans fall apart. This might be a library with story time, an indoor play center, or a mall with play area. Sometimes travel days go sideways, and having a backup plan prevents scrambling.
Research local parenting resources. Many cities offer family-oriented apps or websites detailing playgrounds, splash pads, free activities, and family events. Local parenting Facebook groups often provide insider tips about best beaches, least-crowded attractions, or hidden gem play spaces.
Cultural Considerations
Research car seat laws at your destination before you leave, as requirements vary significantly by state and country. Different destinations have different expectations regarding children in public spaces. Some cultures welcome children everywhere; others expect quieter behavior or limit children in certain establishments. Research these norms to avoid uncomfortable situations or unwelcoming receptions.
Language barriers with children require extra preparation. Learn key phrases in the local language: “bathroom,” “water,” “help,” “doctor,” and “allergic.” Print these phonetically with translations. Teach older children basic phrases for polite interactions.
Food considerations extend beyond preferences to safety. Research typical cuisine ingredients if your child has allergies. Understand water safety - whether tap water is potable or you need to exclusively use bottled water, even for brushing teeth. Many destinations require this precaution.
Jet Lag Management
For East Travel:
- Wake kids early day before
- Get morning sun at destination
- Push to local bedtime
For West Travel:
- Let kids sleep in if possible
- Afternoon sun exposure
- Earlier bedtime than usual
Pre-adjustment at home eases transitions. Three days before eastward travel, shift bedtime 30 minutes earlier each night. For westward travel, shift 30 minutes later. This gradual adjustment prevents the shock of suddenly altered schedules.
Light exposure is the most powerful jet lag tool. Morning sunlight resets circadian rhythms for eastward travel. Afternoon and early evening light helps westward adjustment. Prioritize outdoor time during these crucial windows even when exhausted.
Melatonin may help older children (consult your pediatrician first). Small doses (.5-1 mg) 30-60 minutes before desired bedtime can ease the adjustment process for children over age 3-4. Never use melatonin without medical guidance.
Be realistic about adjustment time. Expect one day of adjustment per time zone crossed. Don’t schedule intensive activities immediately after long-haul flights. Build in 1-2 recovery days with flexible, low-pressure plans.
Dining Out with Kids
Restaurant Strategy
Best Bets:
- Early dining (5-6 PM)
- Kid-friendly establishments
- Outdoor seating when possible
- Places with quick service
Entertainment:
- Small toys/books at table
- Phone/tablet backup
- Walking around if needed
Call ahead to understand wait times, reservation policies, and high-chair availability. Some restaurants accommodate families better at certain times. A place that’s perfect for families at 5 PM might be romantically lit date-night territory by 7 PM.
Arrive prepared with your own entertainment rather than hoping restaurants provide it. Many families rely on screens at restaurants specifically - this isn’t the hill to die on. A tablet showing a favorite show might be exactly what prevents a meltdown and allows parents to actually eat warm food.
Order strategically. Request children’s meals to arrive with adult appetizers if service will be slow. This allows kids to eat before restlessness peaks. Share adult entrees rather than ordering separate kids’ meals if portions are large - restaurants often accommodate this without charging extra.
Build in movement opportunities. Choose restaurants with outdoor space, interesting bathrooms that allow for a walk to visit, or lobbies to explore. Between courses, take one child at a time for a brief walk. Movement breaks prevent meltdowns better than entertainment.
Handling Restaurant Challenges
Meltdowns happen. Have an exit strategy. Identify which adult will take the melting-down child outside while the other stays with remaining family members. Don’t let embarrassment keep you trapped at a table with a screaming child - removing them benefits everyone.
Be prepared to abandon ship. Sometimes restaurants simply don’t work out. The service is too slow, the atmosphere too loud, or your child having an off day. Have takeout backup plans. Leaving isn’t failure; it’s responding appropriately to the situation.
Tip generously when dining with children. Your servers clean up more mess, field more questions, and accommodate more special requests. An extra 5-10% acknowledges the additional work your family creates.
Emergency Preparedness
First Aid Kit
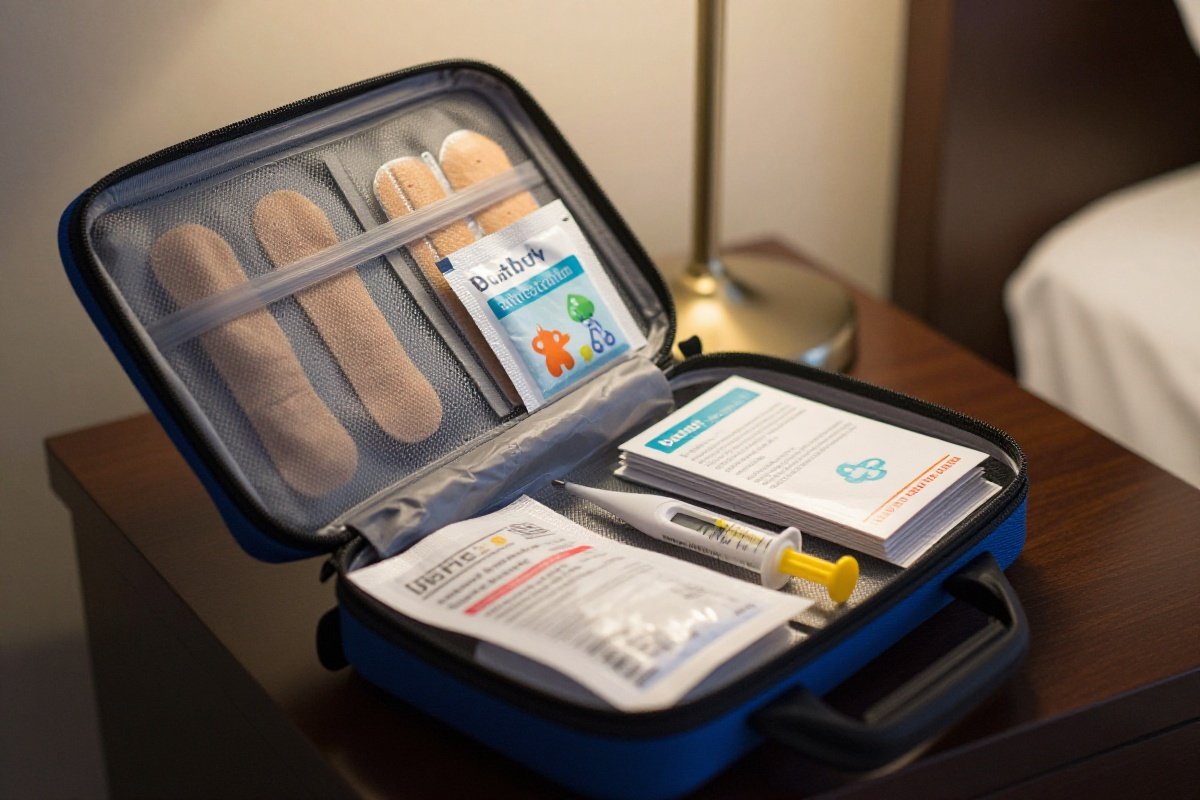
Pack:
- Fever reducers
- Bandages
- Antibiotic ointment
- Thermometer
- Prescription meds
- Antihistamine
Expand your travel first-aid kit beyond basics. Include blister treatment (children’s shoes often cause issues), instant cold packs, tweezers for splinters, and anti-nausea medication. Child-specific pain relievers in both acetaminophen and ibuprofen provide options for different situations.
Prescription medications should be packed in original containers with current labels. Carry a list including drug names, dosages, prescribing physicians, and conditions being treated. This information proves critical if you need medical attention while traveling.
Sun protection and insect repellent appropriate for children’s ages belong in your medical kit. Many destinations have stronger sun intensity or more aggressive insects than you encounter at home. Pediatric-friendly options (mineral sunscreens, DEET-free repellents) work better for sensitive skin.
Medical Situations Abroad
Travel insurance that covers medical emergencies deserves serious consideration for international travel. Standard health insurance often provides limited or no coverage outside the U.S. Medical evacuation insurance, while expensive, covers catastrophic situations requiring transport to appropriate care facilities.
Locate English-speaking providers before you need them. Many destinations have medical clinics specifically serving travelers or expat communities. These facilities understand international insurance, maintain Western standards of care, and communicate effectively with non-native speakers.
Know how to access emergency services in your destination. Not all countries use 911. Research the appropriate emergency numbers and how to request English-speaking assistance if needed.
Important Documents
Carry:
- Copies of birth certificates
- Insurance cards
- Pediatrician contact
- Emergency contacts
- Prescription list
Document redundancy prevents disasters. Keep digital copies of passports, insurance cards, prescriptions, and important documents in a secure cloud location accessible from any device. Leave physical copies with trusted contacts at home. Carry a separate set from your originals in your luggage.
Medical information cards for each child should include allergies, current medications, chronic conditions, and emergency contact information. Keep these in accessible pockets, not buried in luggage. In genuine emergencies, first responders need this information immediately.
Authorization letters for single-parent travel or travel with adults who aren’t parents deserve attention. Some countries require notarized letters from non-traveling parents authorizing international travel. Research your destination’s requirements well in advance.
Building in Downtime
Family travel often fails due to over-scheduling rather than poor planning. Rest days aren’t wasted days - they’re essential for preventing complete meltdowns and actually enjoying your vacation.
Implement a daily “quiet time” even on vacation. Return to your accommodation mid-afternoon for 1-2 hours. Children rest, nap, or play quietly. Adults recharge. Everyone emerges better equipped for evening activities.
The one-big-thing rule transforms travel enjoyment. Plan one major activity or attraction per day. Everything else is flexible or optional. This prevents the forced-march approach to sightseeing that leaves everyone exhausted and cranky.
Follow children’s rhythms rather than fighting them. If your toddler still naps, plan around that nap - return to your room or find quiet spaces during their typical sleep window. Don’t skip naps hoping tired children will sleep better at night. Overtired children sleep worse, not better.
Managing Expectations
Perfect family trips don’t exist. Someone will melt down. Something will go wrong. The expensive activity you planned for months might fail because your child decided they’re afraid of water/heights/costumed characters that day. Accepting imperfection reduces stress dramatically.
Flexible expectations allow you to appreciate successes rather than dwelling on failures. That restaurant meltdown? Everyone’s had them. The ruined photo opportunity? You’ll laugh about it eventually. The rained-out beach day that became an impromptu hotel room fort-building session? Might be your child’s favorite memory.
Involve children in planning age-appropriately. Show older children photos of your destination. Let them choose one activity they’re excited about. When children have investment in the trip beyond being dragged along, cooperation improves and engagement increases.
Create realistic itineraries that account for actual child pacing. Adults can power through museums for three hours. Children cannot. Plan 45-60 minute segments for younger children, 90 minutes maximum for elementary-age kids, with breaks built between activities.
Further Reading
- Uber with Car Seat: Rideshare Safety Guide for Parents
- Flying with a Car Seat: FAA-Approved Seats & Essential Tips for 2026
- When Can Kids Sit in a Booster Seat? Age & Weight Guidelines
Capturing Memories Without the Pressure
Photos shouldn’t drive your trip. The pressure to capture perfect family photos creates stress and conflict. Take some photos, but prioritize actually experiencing moments over documenting every second.
Candid photos often capture vacation spirit better than posed shots. Children playing in the pool, examining shells on the beach, or sleeping soundly in odd positions tell your trip’s story more authentically than forced smiles in front of landmarks.
Involve older children in documentation. Give them disposable cameras or let them take photos with your phone occasionally. Their perspective captures different memories and gives them ownership of recording your adventure.
Journal together at the end of each day. Ask children what their favorite part was, what surprised them, or what they want to remember. Record their answers. These verbal snapshots often prove more precious than any photo as years pass.
Recommended Products
Trunki Ride-On Suitcase
Best airport luggageMakes airport navigation fun and easier.
What We Like
- Kids can ride through airport
- Holds toys and clothes
- Lockable design for security
- Fun character designs available
What We Don't
- Limited packing space compared to traditional luggage
- Not suitable for children over 6 years old
iPad Mini with Case
Best travel entertainmentEssential for long flights and waits.
What We Like
- Compact size perfect for children's hands and travel
- Download shows and content for offline viewing
- Access to thousands of educational apps
- Robust parental controls and Screen Time features
What We Don't
- Expensive investment ($499+ with case)
- Screen time management requires parental vigilance
CARES Harness
Best airplane harnessEasier than bringing car seat on plane.
What We Like
- FAA approved for airplane use
- Weighs only 1 pound
- Compact design fits in carry-on luggage
- Suitable for children 22-44 pounds
What We Don't
- No side impact protection
- Not approved for car use
- Airplane use only - not a car seat alternative
BubbleBum Booster
Best travel boosterPerfect travel booster for destination use.
What We Like
- Inflates for use and deflates for compact storage
- Weighs only 1 pound when deflated
- Fits easily in carry-on luggage or backpack
- Affordable travel booster solution
What We Don't
- Potential for air leaks over time
- Minimal side support compared to rigid boosters
- Requires periodic reinflation during long trips
J.L. Childress Car Seat Bag
Best car seat bagEssential for gate-checking seats.
What We Like
- Protects car seat from dirt and damage during air/gate check
- Backpack-style straps for hands-free carrying
- Fits most standard car seat sizes
- Padded construction for extra protection
What We Don't
- Additional item to pack and manage while traveling
- Can be bulky with car seat inside
Sources & Research
Continue Reading
Explore more travel content or browse our other categories.
Frequently Asked Questions
- What is the best age to travel with kids?
- There's no single "best" age to travel with children - each stage has advantages and challenges. Infants (0-6 months) are often easier to travel with than many expect: they sleep frequently, aren't mobile, nurse or take bottles easily, and don't need entertainment. The main challenges are frequent feeding needs and keeping them comfortable. Babies (6-18 months) become more challenging as they become mobile, need solid food, and require more entertainment, though they're still relatively portable. Toddlers (18 months-3 years) are often considered the hardest age: they have opinions but limited reasoning, need constant supervision, have irregular sleep schedules, and may struggle with confinement on planes. Preschoolers (3-5 years) can be delightful travel companions: they're curious, can walk reasonable distances, understand rules, and get excited about destinations, though they still need naps and early bedtimes. School-age children (6+) are easiest for active travel: they can carry their own bags, handle longer days, remember trips, and participate in planning. The best age depends on your destination, travel style, and child's temperament. Many experienced family travelers find the infant stage surprisingly manageable and recommend not postponing travel dreams.
- How do I pack for traveling with kids?
- Packing strategically makes traveling with kids much smoother. Essential strategies include: Pack outfits in individual ziplock bags - each bag contains a complete outfit (shirt, pants, underwear, socks). This makes getting dressed easy, protects clothes from spills, and compresses items. Bring a change of clothes for everyone in your carry-on for flight delays or baggage issues. Pack more diapers/wipes than you think you need for infants - delays happen. Use packing cubes to organize items by category or family member. Pack a "survival kit" in your carry-on with snacks, wipes, hand sanitizer, small toys, chargers, and medications. Consider doing laundry at your destination rather than packing two weeks of clothes. For road trips, pack a separate easily accessible bag with immediate needs so you don't unpack everything at each stop. Bring familiar comfort items from home - a lovey, favorite book, or small toy helps with sleep in unfamiliar places. Pack medications in original containers in your carry-on. Don't forget outlet covers if traveling with toddlers to non-babyproofed accommodations. For international travel, pack any specific foods your child needs in case they're not available locally. Use a shared packing list app so both parents can contribute and check items off.
- What are tips for flying with toddlers?
- Flying with toddlers requires preparation and strategy. Book flights during nap times or early morning when kids are freshest. Request bulkhead seats or seats near the back where engine noise may help sleep and you're close to bathrooms. Board early with families if you need overhead space, or send one parent ahead while the other lets the toddler burn energy until final boarding call - this prevents confinement time. Pack a carry-on with new small toys wrapped individually - the unwrapping takes time and the novelty keeps interest. Bring snacks that take time to eat like Cheerios, puffs, or string cheese. Load tablets with offline content before departure. Walk the aisle periodically for movement breaks. Bring a change of clothes for everyone in case of spills or accidents. For pressure changes during takeoff and landing, have toddlers drink from a sippy cup or suck on a lollipop - swallowing helps equalize ear pressure. Consider a CARES harness (FAA-approved) instead of a car seat for easier maneuvering, or bring a lightweight car seat if you need it at your destination anyway. See our [guide to car seat stroller combos](/car-seat-stroller-combo-guide/) for travel-friendly options. Pack more diapers than you think you need. Accept that some crying may happen - most passengers are understanding parents themselves. Stay calm; toddlers pick up on parental stress.'
- How do I entertain kids on long flights?
- Entertaining kids on long flights requires variety and novelty. Before the trip, download offline content: movies, TV shows, games, and educational apps on tablets. Don't rely on airplane WiFi - it often doesn't work well or costs extra. Pack a "surprise bag" with small new toys wrapped individually. Good options include sticker books, Water Wow pads (mess-free coloring), small LEGO sets, magnetic blocks, and fidget toys. The unwrapping itself entertains. For younger kids, tape is surprisingly engaging - washi tape that peels off easily can stick to tray tables and seats. Bring familiar favorites too - a beloved book or small toy provides comfort. Plan activities in phases: screen time, then snack, then activity book, then walk the aisle, then repeat. Don't use all your entertainment at once - pace it throughout the flight. For older kids, load audiobooks or podcasts. Pack snacks that take time to eat: string cheese, granola bars, fruit leather, crackers. Bring empty sippy cups to fill with water or juice after security. For babies, nursing or bottles during takeoff and landing helps with ear pressure. Consider a new toy or book they've never seen for peak fussiness moments. Accept that some boredom is okay - kids don't need constant entertainment.
- What should I pack in a kids travel first aid kit?
- A well-stocked travel first aid kit for kids should include: Fever and pain relief - acetaminophen (Tylenol) and ibuprofen (Advil/Motrin) in children's formulations, with appropriate dosing syringes or cups. Include your pediatrician's recommended doses written down. Thermometer - digital is most reliable. Bandages in various sizes, including fun character ones that make boo-boos better. Antibiotic ointment for cuts and scrapes. Hydrocortisone cream for bug bites and rashes. Antihistamine for allergic reactions - diphenhydramine (Benadryl) approved by your pediatrician. Prescription medications your child takes regularly - pack extra in case of travel delays. Motion sickness medication if your child is prone to car sickness. Electrolyte powder packets for dehydration from stomach bugs. Sunscreen (SPF 30+) and insect repellent (DEET or picaridin-based). Hand sanitizer and sanitizing wipes. Tweezers for splinters. Nail clippers. Any specific medical supplies your child needs - epipen, inhaler, etc. Keep all medications in original containers with pharmacy labels, especially for air travel security. Pack this in your carry-on, never checked luggage. Research the location of pediatric urgent care or hospitals at your destination before you travel. Consider travel insurance that covers pediatric medical emergencies.
Written By
Kid Sitting Safe
Our team researches car seat safety standards, crash test data, and real-world usability to help parents make the safest choice.
Related Articles
Flying with a Car Seat: FAA-Approved Seats & Essential Tips for 2026
Essential guide to flying with car seats. Learn FAA-approved options, installation on airplanes, gate-checking tips, and traveling with children safely by air.
Uber with Car Seat: Rideshare Safety Guide for Parents
Navigate rideshare with kids safely. Learn about Uber Car Seat, bringing your own seat, airport rides, and alternatives for family transportation.
Best Travel Car Seats 2026: Lightweight and FAA-Approved
We tested the best travel car seats of 2026 for flying, taxis, and road trips. Compare lightweight, FAA-approved options that keep your child safe away from home.