Affiliate Disclosure:Kid Sitting Safe is reader-supported. When you buy through links on our site, we may earn an affiliate commission at no additional cost to you. This does not influence our reviews or recommendations — we only recommend products we genuinely believe in.
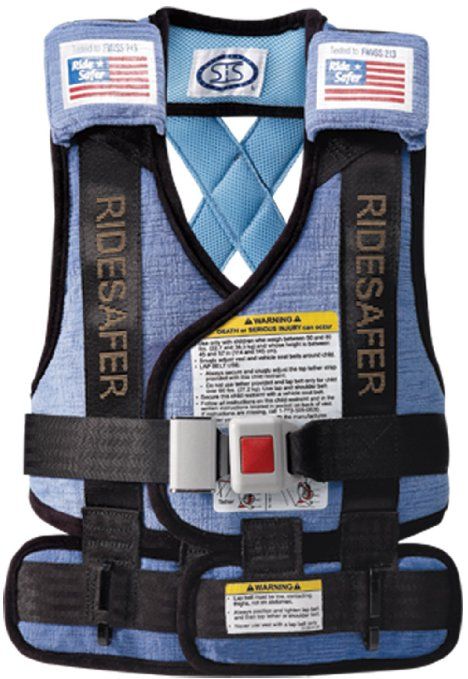
RideSafer Gen 5 Travel Vest, Small
Best booster alternativeCompact alternative to booster seats.
What We Like
- Ultra-compact design fits in diaper bag
- Simple to install and use
- Children find it comfortable and less restrictive
- FMVSS 213 certified for safety
What We Don't
- Only suitable for children in booster seat age/size range
- Does not provide side impact protection like traditional car seats
Generation note: Everything below describes the RideSafer Gen 5, which is the version we card. Safe Traffic System now also sells a Gen 6, and its size bands are not the same as Gen 5’s. Check which generation a listing is actually selling before you buy off the weight ranges here.
The RideSafer travel vest offers a unique solution to an age-old parenting challenge: how to keep children safe in vehicles when carrying a traditional car seat isn’t practical. This innovative restraint packs car seat functionality into a pound-and-a-half vest that fits in a backpack.
This review examines whether the RideSafer is a legitimate safety device or a compromise too far.
What Is the RideSafer?
FMVSS 213 Certified
The RideSafer is a federally certified child restraint that meets the same safety standards as traditional car seats. It’s not a gadget or accessory, it’s a legitimate, crash-tested restraint system. Safe Traffic System’s own wording is that the “RideSafer® Travel Vest is tested and certified to the dynamic test requirements specified in FMVSS 213.”
Federal Motor Vehicle Safety Standard 213 sets that dynamic test at a velocity change of 48 km/h, about 30 mph, and caps what the crash dummy is allowed to experience: a head injury criterion no higher than 1,000, chest acceleration no more than 60 g outside brief spikes, and the head kept behind a plane 813 mm forward of the seat reference point. The vest goes through that sled test the way a conventional car seat does. Unlike unregulated products marketed as “safety devices,” the RideSafer’s certification gives you documented evidence of crash performance.
One limit on that certification is easy to miss. FMVSS 213 defines a child restraint system as a device for “children who weigh 36 kilograms (kg) (80 lb) or less”, so the 80-110 lb XL sits outside the standard’s scope altogether. RideSafer says so itself in the current manual for that size: “This child restraint system is not certified to FMVSS 213B. It is designed for children 80-110 lb, a range outside the FMVSS 213B scope. Tested using FMVSS 213B test methods and evaluated against FMVSS 213B performance requirements.” Tested to the method, then, but not certified to the standard. The smaller sizes sit inside the scope and are certified.
The vest’s label reads “This child restraint conforms to all Federal motor vehicle safety standards.” That’s the federal standard, which is a separate question from your state’s child restraint law: those are written state by state and some are worded around boosters specifically. Check your own state’s wording rather than assuming a vest counts everywhere a booster does.
How It Works
Instead of a shell with a harness, the RideSafer:
- Wears like a vest on the child
- Routes the vehicle’s lap-shoulder belt through guides
- Positions the belt correctly on the child’s body
- Adds a top tether, required with a lap-only belt and recommended with a lap and shoulder belt
The vest’s design philosophy differs fundamentally from traditional car seats. Understanding when kids can sit in a booster seat helps parents decide between the RideSafer and conventional options. Rather than creating a protective shell around the child, it positions the vehicle’s existing three-point belt system in optimal locations across the child’s body. The vest includes reinforced channels that guide the lap belt across the pelvis and the shoulder belt across the chest and shoulder - the same positioning a properly fitted booster achieves.
The fabric construction uses multiple layers of high-strength materials similar to those in seat belt webbing itself. During a crash, these materials distribute forces across a wider area of the child’s body rather than concentrating them at a single point. The top tether strap attaches to the vehicle’s tether anchor (the same anchor used for forward-facing car seats with harnesses) and limits forward movement during frontal impacts.
Installation Mechanics
Installing the RideSafer takes more steps than placing a child in a booster, but less time than installing a convertible car seat. First, you put the vest on your child while outside the vehicle, adjusting the velcro closures for a snug fit. Then the child sits in the vehicle seat, and you thread the vehicle’s seat belt through the vest’s designated channels. Finally, you attach the top tether strap from the back of the vest to the vehicle’s tether anchor behind the seating position.
The entire process takes two to three minutes once you’re familiar with it. The first few times require careful reference to the instruction manual to ensure correct belt routing, but it becomes intuitive with practice.
At a Glance
| Specification | Details |
|---|---|
| Weight | About 1.5 lb, measured by Car Seats for the Littles. The manufacturer publishes no figure |
| Size Range | Four sizes: XS 22-44 lb, Small 30-60 lb, Large 50-80 lb, XL 80-110 lb |
| Age Recommendation | 3+ years (4+ preferred) |
| Certification | FMVSS 213, except the XL, which is above the standard’s 80 lb scope |
| FAA Approved | No |
| Price Tier | Premium |
| Material | Multi-layer reinforced polyester |
| Color Options | Black, blue and yellow, and not every colour is made in every size |
| Washing | Spot clean, or machine wash the vest alone in a laundry bag. Air dry either way |
| Replace After | 5 years from the date of purchase, per the manual |
When RideSafer Excels
Travel Situations
Airport Ground Transportation: Rent a car at your destination? Use the RideSafer instead of hauling a seat through the airport or paying rental company fees. For more on navigating air travel with child restraints, see our guide to flying with a car seat.
The economics make sense for frequent travelers. Rental car companies typically charge a daily fee for car seat rentals, and the seats provided are often of unknown history - you can’t verify whether they’ve been in accidents or properly maintained. A RideSafer pays for itself after a handful of rental days, and you know its complete history. Taxis and Rideshares: Uber with kids becomes manageable. Keep the compact vest in your bag for unexpected car rides.
In most jurisdictions, rideshare regulations don’t require car seats for children over certain ages - though car seat laws vary significantly by state - but safety-conscious parents face a dilemma: compromise safety or avoid rideshares entirely. The RideSafer provides a middle ground - legitimate protection that you can carry in a backpack or large purse. This becomes especially valuable during business trips when you might need to take your child to a meeting or event without access to your own vehicle.
Grandparent/Carpool Vehicles: Leave a vest in secondary vehicles instead of buying multiple car seats.
Many families maintain multiple car seats: one for each parent’s vehicle, one for grandparents’ house, one for the babysitter’s car. Equipping multiple vehicles with quality convertible seats adds up quickly. A single RideSafer vest that lives at grandma’s house provides legitimate protection at a fraction of the cost of buying multiple full-size car seats. For carpools, families can provide their own vests rather than asking the driver to accommodate multiple bulky seats.
Real-World Scenarios
The City Parent: No car of your own, but occasional taxi rides with your preschooler. The RideSafer lives in your diaper bag.
Urban families who primarily walk, bike, or use public transit still occasionally need car transportation. Emergency medical visits, special events outside subway range, or trips carrying heavy items require taxis or rideshares. The RideSafer enables these trips without maintaining a full-size car seat in a small apartment.
The Traveling Family: International travel where car seat regulations and availability vary. Bring your own certified restraint.
Different countries have different car seat regulations, and availability of rental seats varies dramatically. In some destinations, rental car seats are poorly maintained or decades old. The RideSafer’s compact size and universal vehicle compatibility make it ideal for international travel. It fits in checked luggage without eating up your entire baggage allowance.
The Multi-Child Family: Fitting three car seats across a back seat can be impossible. The RideSafer’s slim profile creates more space.
Vehicle back seats have limited width, and three traditional car seats often won’t fit, even in SUVs. The RideSafer’s minimal width footprint (essentially just the child’s body) can enable three-across seating where three car seats physically won’t fit. This becomes critical when a family adds a third child but can’t afford a larger vehicle.
The Divorced or Separated Parent: Simplified transitions between households when each parent keeps their own set.
Co-parenting often involves frequent vehicle transfers. Instead of moving car seats between vehicles during pickups and handoffs (which risks installation errors), each parent can have a RideSafer. The affordable price point makes purchasing two vests reasonable, and the child knows how to use the same system in both homes.
Limitations to Understand
No Side Impact Protection
Unlike highback boosters, the RideSafer provides no side structure or cushioning. In side-impact collisions, the child has only the vehicle’s interior for protection.
This represents the most significant safety trade-off. Highback boosters with side wings provide head and torso protection during side-impact crashes, absorbing energy and preventing contact with vehicle doors or intruding objects. The RideSafer offers no such protection - the child’s head, neck, and torso have nothing but air between them and the vehicle’s interior surfaces.
NHTSA put some scale on this in the final rule that created FMVSS 213a. Looking at the 213 annual fatalities of children aged 0 to 12 who were restrained in a child restraint in the rear seat of a light vehicle between 2015 and 2019, the agency found that “approximately 31 percent occurred in frontal crashes, 25 percent in side crashes, 22 percent in rollovers, and 19 percent in rear crashes” (87 FR 39234). That’s fatalities among already-restrained children, not injuries generally. Frontal crashes still account for more, but side impacts are harder to engineer against, because modern vehicles have substantial crumple zones in front and very little protection space at the sides. Parents must weigh this limitation against the RideSafer’s benefits for their specific use case.
For primary vehicle use where you drive the same car daily, a highback booster with side impact protection provides superior overall safety. The RideSafer makes more sense for secondary or occasional use where its portability advantages outweigh the side impact limitation.
Learning Curve
Proper adjustment requires practice. The vest must fit snugly, and belt routing must be correct every time.
The RideSafer requires more active parent involvement than simply placing a child in a booster. You must correctly tighten all vest adjustments, route the vehicle belt through the proper channels (which differ slightly by vehicle belt geometry), and attach the tether strap to the correct anchor point. Each of these steps must be performed correctly every time.
Mistakes happen more easily with the RideSafer than with simpler restraint systems. A booster either elevates the child or it doesn’t - there’s little room for user error. The RideSafer has multiple adjustment points where incorrect settings reduce effectiveness, so expect the first few installs to be slower and more deliberate than the ones after.
Read the instruction manual properly before you use it the first time. The manufacturer provides online videos demonstrating correct installation in various vehicle types, and these videos prove invaluable for visual learners. Plan to practice installation at home before relying on the RideSafer in an urgent travel situation.
Maturity Required
Children must sit properly without slouching. The vest doesn’t enforce position like a highback booster does.
A highback booster physically encourages upright seating through its back structure. Children naturally lean against the booster’s back, maintaining proper position. The RideSafer lacks this passive positioning system - if your child slouches, leans sideways, or curls up to sleep, the restraint becomes less effective.
This maturity requirement isn’t just about behavior; it’s a safety consideration. A child who consistently fails to sit upright may experience incorrect belt positioning during a crash, potentially leading to injury from the belt itself or excessive head excursion. The 4+ year age recommendation (rather than just the 3+ minimum) reflects this maturity need.
Parents must honestly assess their child’s ability to maintain proper seating position. Some 5-year-olds consistently slouch, while some 3.5-year-olds sit perfectly upright. Age provides only a rough guideline - observe your child’s actual behavior during car rides before trusting them in a RideSafer.
Tether Rules
When the tether is required depends on which belt you’re using, and RideSafer’s manual is explicit about it: “Use of top tether is required when using a vehicle lap belt only and recommended with lap and shoulder belt.” The same manual adds, in capitals, “NEVER use only a lap belt without the top tether or shoulder belt.”
So a lap-belt-only position needs a tether anchor, and RideSafer tells you not to use the vest there without one. A position with a lap and shoulder belt, which is nearly every rear seat in a modern car, doesn’t: there the tether is recommended rather than required, and the company sells a no-tether version of the vest for exactly that use. Use the tether when you can, since it limits forward rotation and head excursion in a frontal impact, but a missing anchor isn’t the dead end it would be for a harnessed forward-facing seat.
Where the anchors are is better than most parents expect. FMVSS 225 requires a vehicle with three or more forward-facing rear seating positions to carry a tether anchorage at a third position, and says that “in each vehicle with a forward-facing rear designated seating position other than an outboard designated seating position, at least one tether anchorage … shall be at such a designated seating position”, which means the centre seat when the car has one.
Check your vehicle owner’s manual for anchor locations anyway, because older vehicles and some seat layouts are exceptions. The case where the RideSafer genuinely won’t work is a lap-belt-only position with no tether anchor at all.
Climate Considerations
The vest adds a layer of fabric, which can cause discomfort in hot weather or heated vehicles.
Children who already protest “being too hot” in car seats may resist wearing the vest during summer months. The multi-layer construction provides minimal breathability, and the snug fit required for safety prevents air circulation against the skin. In vehicles without effective air conditioning or during initial entry into hot cars, comfort can become an issue.
Conversely, the vest provides some welcome insulation during winter, though it shouldn’t replace proper winter clothing in cold climates. The key is managing the transition - the vest works best when put on immediately before vehicle use rather than wearing it continuously throughout an outing.
Comparison: RideSafer vs. Alternatives
| Feature | RideSafer | Backless Booster | Highback Booster | Convertible Seat |
|---|---|---|---|---|
| Weight | About 1.5 lbs | 2-3 lbs | 5-10 lbs | 15-30 lbs |
| Side Impact | None | None | Yes | Yes |
| Portability | Excellent | Good | Moderate | Poor |
| Setup Time | 2-3 minutes | 30 seconds | 1 minute | 5-10 minutes |
| Cost | Premium | Budget | Budget-Mid | Mid-Premium |
| Typical Lifespan | 5 years from purchase | 6+ years | 4-6 years | 6-10 years |
| Storage Space | Minimal | Minimal | Moderate | Substantial |
| Age Suitability | 3-8 years | 4-10 years | 4-10 years | Birth-10 years |
Extended Comparison Discussion
Each restraint type serves different priorities. Understanding these differences helps parents select the right tool for specific situations.
Backless boosters offer the simplest solution for basic belt positioning. They cost less, weigh less, and require no special installation knowledge. However, they provide no side impact protection and don’t work well with young children who need head support during sleep. They excel as no-frills backup restraints for grandparents’ vehicles or as space-saving solutions when fitting multiple children in a single row.
Highback boosters represent the gold standard for everyday use in primary vehicles - see our booster seat reviews for top picks. Side impact wings protect the head and torso, adjustable head restraints accommodate growth, and the structure encourages proper posture. They’re bulkier and heavier than RideSafer or backless boosters, but for daily use where safety takes absolute priority over portability, they’re the better choice. Many models include cup holders and armrests that children appreciate.
Convertible seats with five-point harnesses provide maximum protection for younger children. They’re designed to be installed once and left in place, offering superior side impact protection and the security of a harness system rather than vehicle belt. They’re completely impractical for travel or multiple vehicle use, but for children still within harness weight limits (typically up to 65 pounds), they provide the best overall protection.
The RideSafer occupies a unique niche: situations where portability matters enough to justify the side impact protection trade-off. It’s not the best single solution for every scenario, but rather a specialized tool that excels in specific circumstances.
Who Should Buy RideSafer?
Choose RideSafer If:
- You frequently use taxis or rideshares
- You travel often by air and need destination transportation
- You want a compact emergency backup restraint
- You have limited storage space
- You need to equip multiple secondary vehicles affordably
- Your child rides in multiple vehicles regularly
- You live in an urban area without a personal car
- You need three-across seating in a narrow back seat
- You fly frequently for business with your child
- You value flexibility over maximum protection
Choose Traditional Boosters If:
- You primarily use your own vehicle
- Side impact protection is a priority
- You want the simplest solution
- Budget is a primary concern
- Your child sleeps during car rides and needs head support
- You rarely travel or use secondary vehicles
- Your vehicle has ample space for larger restraints
- Setup time and ease of use are critical
- Your child is younger than 4 years old
- You prefer passive safety systems that don’t depend on proper seating position
Choose to Skip RideSafer If:
- Your child cannot sit properly without slouching
- You want set-it-and-forget-it convenience
- You’re uncomfortable with multi-step installation procedures
- The seating position you need has a lap belt only and no tether anchor
- Side impact protection is non-negotiable for you
- You need FAA-approved airplane restraints
- Your child falls outside every available size band, or sits right at the edge of one
- You’re unwilling to practice installation before travel
Proper Use Guidelines
Critical Steps
- Proper fit: Vest should be snug but not tight
- Correct belt routing: Lap belt through lower guides, shoulder through upper
- Tether use: Connect top tether whenever anchor is available
- Maturity check: Child must sit properly without reminder
Detailed Installation Process
Step 1: Vest Fitting (Outside Vehicle) Place the vest on your child while standing. The bottom edge should rest on the hips, not the waist. Tighten the velcro adjustments until the vest fits snugly against the torso - you should be able to slide two fingers between the vest and child, but no more. Check that the shoulder straps sit flat without twisting and that the vest doesn’t ride up when you gently pull upward.
Step 2: Vehicle Positioning Seat your child in the designated vehicle position. The vehicle seat should be as upright as possible - avoid reclined positions that encourage slouching. If using the center position, check your vehicle owner’s manual for whether that position has its own tether anchor.
Step 3: Lap Belt Routing Thread the vehicle’s lap belt through the lower guides on each side of the vest. These guides keep the belt positioned low across the pelvis and upper thighs, not across the soft abdomen. The lap belt should cross the child’s body at approximately the same position it would on an adult wearing the belt correctly - across the hip bones.
Step 4: Shoulder Belt Routing Route the shoulder belt through the designated upper guide. This guide positions the belt across the chest and over the shoulder, preventing it from crossing the neck or sliding off the shoulder. The shoulder belt should not touch the child’s neck and should rest firmly against the chest and shoulder.
Step 5: Belt Buckling Insert the belt tongue into the vehicle’s buckle and ensure it clicks securely. Pull all slack from both the lap and shoulder portions of the belt. The belt should be tight enough that you cannot pinch excess webbing between your fingers.
Step 6: Tether Attachment Locate the vehicle’s tether anchor for the selected seating position (consult your vehicle owner’s manual if unsure). Attach the tether clip to the anchor and tighten the strap until snug. The tether should have no slack but shouldn’t pull the child backward against the vehicle seat back.
Step 7: Final Check Verify that the child sits upright, the vest hasn’t shifted, all belt routing is correct, and the tether is tight. Remind the child about proper sitting position and not playing with the vest adjustments during the ride.
Common Mistakes
- Loose vest fit allowing too much movement
- Incorrect belt routing through wrong guides
- Missing tether connection
- Using before child has sufficient maturity
- Installing with the vehicle seat too reclined
- Failing to remove all belt slack
- Tether attached to cargo hooks instead of proper tether anchors
- Using in seating positions without head restraints
- Vest adjustments not checked after initial installation
- Allowing child to loosen vest during the ride
Maintenance and Care
RideSafer’s manual gives you two options: “Spot clean with mild soap and water Air Dry. Or machine wash (vest only) in laundry bag with gentle detergent. Air Dry.” The vest only, not the tether or crotch strap, and air dry either way rather than putting it through a dryer.
Inspect the vest regularly for signs of wear: frayed webbing, damaged velcro that won’t hold securely, or any tears in the fabric layers. Check the tether strap for wear where it contacts the anchor. Replace the vest if you observe significant damage. There’s also a hard stop regardless of condition, in the manual’s words: “Discontinue use after 5 years from the date of purchase.”
Store the vest flat or hanging rather than compressed at the bottom of a bag long-term. While it tolerates compression during travel, extended storage under weight can create permanent creases that affect fit.
Size Range and Fit Considerations
Across its four sizes the range runs from 22 to 110 pounds, covering most children from around age 3 upward, though individual body proportions vary. Buy for the band your child is in now, not the one they are growing into: each vest adjusts for weight and height through its velcro closure system, but it works best when the child sits solidly in the middle of its band rather than at either extreme.
Smaller children (30-40 pounds): The vest may feel bulky on petite 3-year-olds, even with maximum adjustment. Ensure the vest doesn’t extend too far down the legs, which could create uncomfortable pressure behind the knees. The shoulder guides should position the belt correctly across the chest, not near the neck.
Larger children (60-80 pounds): Bigger kids need maximum adjustment, and parents should verify that adequate velcro overlap remains for secure fastening. If you can close the vest but less than 2 inches of velcro overlaps, the child is approaching the upper limit. The vest should cover the torso adequately without pulling tight across the chest.
Height considerations: Taller, thinner children may outgrow the vest by height before reaching weight limits. The shoulder guide position must accommodate the child’s torso length. Shorter, heavier children may reach weight limits while the vest still appears to fit - respect weight limits even if fit seems adequate.
Further Reading
- Car Seat Expiration: Why It Matters & How to Check Dates
- Car Seat Types & Ratings Explained: Complete Parent”s Guide
- Car Seat Technology Innovations 2024-2026: Smart Safety Features
Final Verdict
The RideSafer travel vest succeeds at its intended purpose: providing portable, certified child restraint for situations where traditional car seats aren’t practical. It’s not a replacement for proper car seats in primary vehicles, but rather a specialized tool for specific scenarios.
Its greatest strength is versatility. One pound-and-a-half vest replaces multiple car seats across various use cases: travel, rideshares, secondary vehicles, and space-limited situations. For families who face these scenarios regularly, the RideSafer solves real problems that no other certified restraint addresses as effectively.
The side impact protection limitation represents a genuine trade-off. Parents must decide whether the convenience benefits outweigh this safety consideration for their specific use patterns. For occasional use where the alternative might be no restraint at all (unsafe rideshare rides, borrowed vehicles), the RideSafer dramatically improves safety. For daily use where a highback booster fits comfortably, the booster provides more comprehensive protection.
The learning curve and maturity requirements create barriers to use. Unlike boosters that work almost intuitively, the RideSafer demands active parent involvement and child cooperation. Families willing to invest time practicing proper installation will find it becomes second nature, but it’s never as simple as a basic booster.
Consider the RideSafer as a supplementary safety tool rather than a primary solution. It excels in its niche - portable, certified restraint for modern mobile families - while acknowledging that different tools serve different purposes better. A family using the RideSafer for vacation rental cars while maintaining highback boosters in their daily vehicles demonstrates optimal use: the right tool for each specific situation.
Sources & Research
Continue Reading
Explore more car seat education content or browse our other categories.
Frequently Asked Questions
- Is the RideSafer vest actually safe compared to a regular car seat?
- The RideSafer vest is FMVSS 213 certified, meaning it meets the same federal safety standards as traditional car seats. The 80-110 lb XL size is the exception: that band sits above the 80 lb ceiling of what FMVSS 213 even covers, and RideSafer's own manual for it says it is tested to the standard's methods rather than certified to the standard. In this sense, it is "safe" and legal for use. However, it works differently than traditional seats. The vest positions the adult seat belt correctly on a child's body (lap belt low on hips, shoulder belt across chest) rather than providing a shell with harness or side impact protection. The vest excels in portability - weighing about a pound and a half and folding to the size of a paperback book. For taxis, rideshares, and air travel, it's far more practical than hauling a traditional seat. However, for daily use in your own vehicle, a traditional car seat with side impact protection is preferable. Use the RideSafer for its intended purpose: travel and occasional use where a traditional seat isn't practical.
- When can my child use a RideSafer vest?
- The RideSafer Gen 5 comes in four sizes and each has its own weight range, so "the RideSafer" has no single figure. XS covers 22-44 lb, Small 30-60 lb, Large 50-80 lb and XL 80-110 lb. All are for children at least 3 years old (though 4+ is recommended for maturity). The child must be able to sit properly for the entire trip without slouching, leaning, or unbuckling themselves. The vest essentially turns the adult seat belt into a child-appropriate restraint by positioning it correctly. Unlike a booster that just elevates the child, the vest holds the belt in proper position on the body. Each size has its own minimum, and below it the vest can't position the belt correctly, so buy for the band your child is in now rather than the one they're growing into. Most children are ready between ages 4-6, depending on size and maturity. At the top of the range the XL carries to 110 pounds, past the point most children are ready for the adult belt alone.
- Can I use RideSafer on an airplane?
- No, the RideSafer vest is not FAA approved for aircraft use. The FAA only approves traditional car seats with harnesses and specific labeling for aircraft. For air travel, the RideSafer can be carried on (it fits in a backpack) and used in rental cars, taxis, and rideshares at your destination. For the flight itself, children under 40 pounds should use an FAA-approved car seat (like the Wayb Pico), and children over 40 pounds can use the aircraft seat belt alone. The RideSafer's value is in ground transportation at your destination, not during the flight. Always check with your airline for specific child restraint policies before traveling.
- How does RideSafer compare to a booster seat?
- Both RideSafer and booster seats position the adult seat belt correctly on a child, but they work differently. A booster elevates the child so the belt fits properly, while the RideSafer vest positions the belt on the child's body at normal seat height. The RideSafer offers: greater portability (about 1.5 lbs vs 5-10 lbs), no side impact protection (boosters with backs offer this), works in any seat (backless boosters need head support), and requires more setup time. Traditional boosters are: faster to use (just sit and buckle), often less expensive, offer highback options with side impact protection, and more familiar to caregivers. For daily use, a booster is generally preferable. For travel where you carry the restraint with you, RideSafer's portability wins.
- What are the limitations of the RideSafer vest?
- The RideSafer vest has several limitations to understand: 1) No side impact protection - unlike highback boosters, the vest provides no cushioning or structure for side crashes; 2) Learning curve - proper adjustment takes practice and must be done correctly every time; 3) Sizing - you buy one size band rather than a seat that grows, and each vest spans only about 20 to 30 pounds, so a growing child eventually needs the next size rather than an adjustment; 4) Maturity required - child must sit properly without slouching, which some children struggle with; 5) Tether rules to learn - RideSafer requires the top tether whenever you use a lap belt only, and recommends it with a lap and shoulder belt; 6) Cost - at premium-priced, it's more expensive than basic boosters. Despite these limitations, it's the best solution for specific use cases: frequent taxi/rideshare users, travel, and situations where carrying a traditional seat isn't practical.
Written By
Kid Sitting Safe
Our team researches car seat safety standards, crash test data, and real-world usability to help parents make the safest choice.
Related Articles
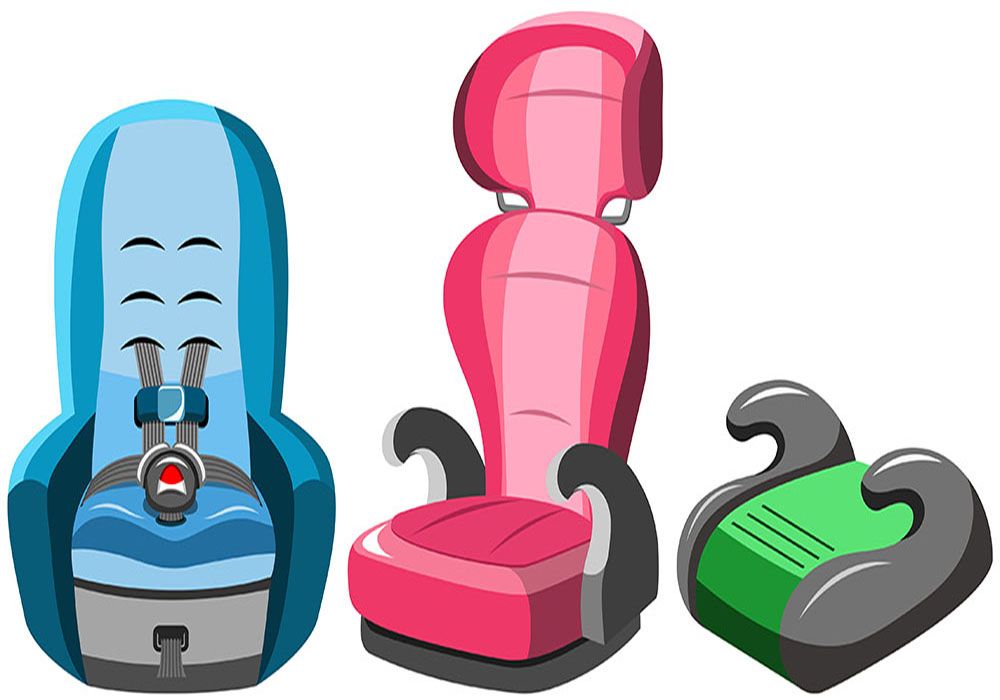
Car Seat Types & Ratings Explained: Complete Parent's Guide
Understand all car seat types from infant to booster. Learn about NHTSA ratings, FMVSS 213 standards, and how to choose between infant, convertible, all-in-one, and booster seats.
Car Seat Expiration: Why It Matters & How to Check Dates
Learn why car seats expire and how to check expiration dates. Understand material degradation, safety standard updates, and when to replace your child's car seat.
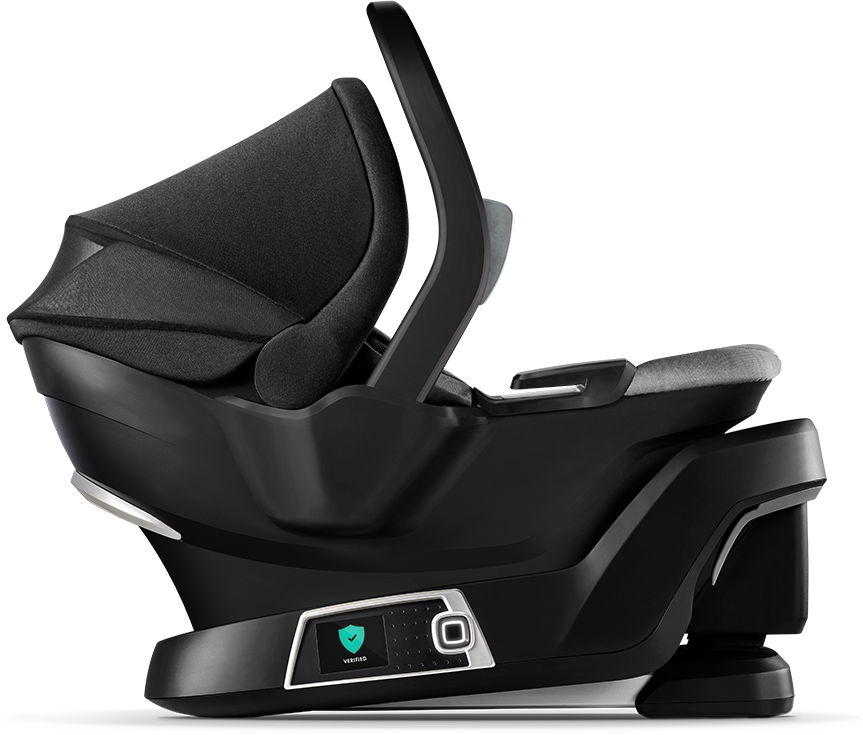
Car Seat Technology Innovations 2024-2026: Smart Safety Features
Explore the latest car seat technology innovations from 2024-2026. Smart sensors, app connectivity, advanced materials, and AI-powered safety features transforming child passenger safety.