Affiliate Disclosure:Kid Sitting Safe is reader-supported. When you buy through links on our site, we may earn an affiliate commission at no additional cost to you. This does not influence our reviews or recommendations — we only recommend products we genuinely believe in.
Cycling is a beloved childhood activity that promotes physical fitness, independence, and outdoor exploration. However, bikes can also pose injury risks without proper safety measures. Just as car seat safety is non-negotiable for vehicle travel, bike safety requires the same level of attention for every ride. This comprehensive guide covers everything parents need to know about bike helmets, safety gear, and riding rules to keep young cyclists protected.
The Importance of Bike Helmets
Injury Prevention Statistics
Head Injury Reduction:
- Helmets reduce head injury risk by 85%
- Reduce facial injury risk by 65%
- Reduce fatal head injury by 70%
Real-World Impact: Helmets are estimated to prevent approximately 190 child deaths and 65,000 head injuries annually in the United States.
These numbers represent real children whose lives were saved or whose injuries were significantly reduced because they wore properly fitted helmets. When you consider that bicycle-related injuries send over 300,000 children to emergency rooms each year, the protective value of helmets becomes undeniable.
Helmet Effectiveness by Crash Type
| Crash Type | Injury Reduction |
|---|---|
| Falls (most common) | 88% |
| Collisions with cars | 74% |
| All crash types | 85% average |
Falls represent the vast majority of cycling accidents for children, particularly those just learning to ride. Unlike adult cyclists who often face vehicle-related crashes, children typically crash due to loss of balance, hitting obstacles, or misjudging turns. The good news is that helmets are especially effective at preventing injuries in these common scenarios.
How Helmets Protect
Understanding helmet mechanics helps reinforce their importance. Modern bike helmets work through two key mechanisms:
Energy Absorption: The foam liner inside the helmet compresses upon impact, spreading the force of the collision over a larger area and extending the time of impact. This reduces the peak force transmitted to the skull and brain.
Barrier Protection: The hard outer shell prevents sharp objects from penetrating and distributes impact forces across the helmet’s surface rather than concentrating them at one point.
Rotational Force Management: Advanced helmets with MIPS (Multi-directional Impact Protection System) include a low-friction layer that allows the helmet to rotate slightly upon impact, reducing rotational forces that can cause concussions and brain injuries.
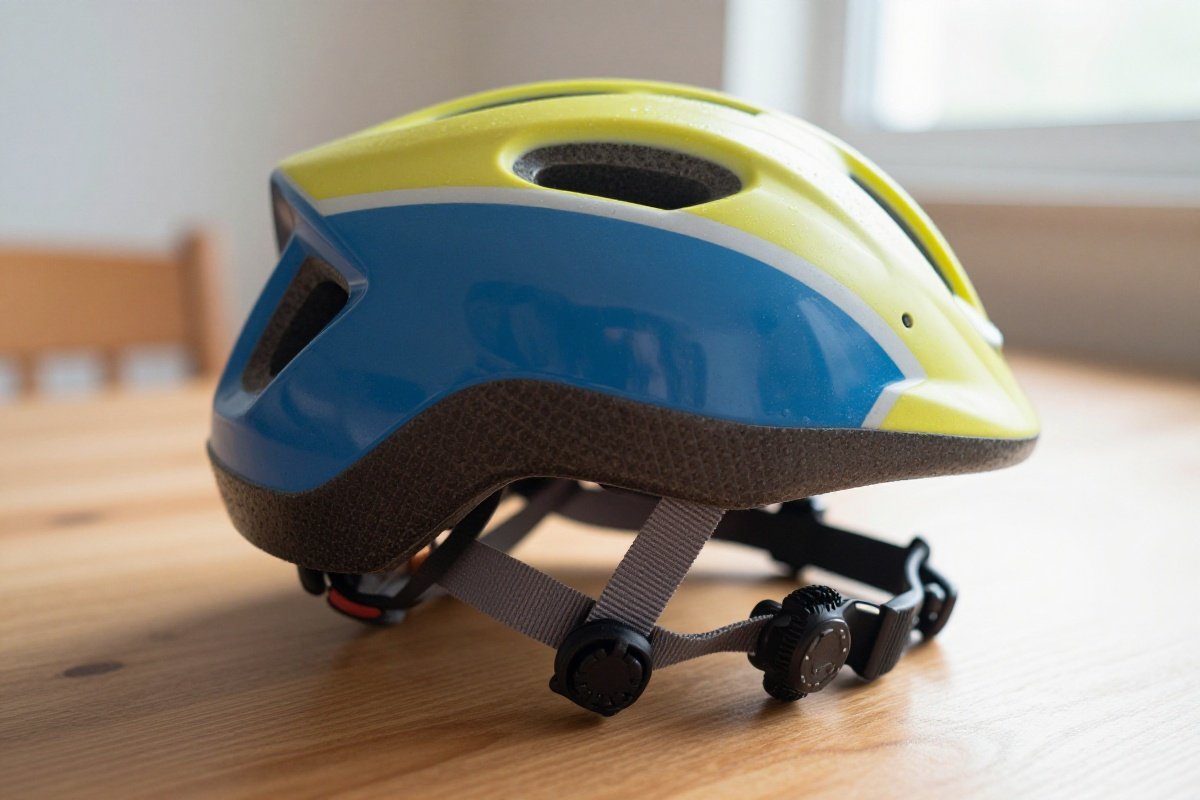
Proper Helmet Fit
A helmet only works when it fits correctly. Unfortunately, studies show that up to 80% of children wear helmets incorrectly, significantly reducing their protective value. Taking the time to achieve proper fit dramatically improves safety outcomes.
The Two-Finger Rule
Horizontal Position:
- Helmet sits level on head
- Two finger-widths above eyebrows
- Forehead protected, vision unobstructed
The forehead is particularly vulnerable to injury, yet many children wear helmets pushed back on their heads, leaving this critical area exposed. The “two-finger rule” provides an easy reference point that children can check themselves before each ride.
Vertical Stability:
- Shake head - helmet stays in place
- Push front and back - minimal movement
- Side-to-side - stays centered
Have your child perform these movements while you observe. The helmet should feel like an extension of their head, moving with them rather than sliding around. If it shifts significantly, readjust the fit system or try a different size.
Strap Adjustment
Side Straps:
- Form “Y” below each ear
- Meet at jawline point
- No slack when buckled
The Y-junction should sit just below the earlobe, not touching it. This positioning ensures that both front and rear straps provide equal stabilization. Many helmets include sliders on the straps that allow you to adjust this junction point precisely.
Chin Strap:
- One finger fits between strap and chin
- Tight enough to keep helmet in position
- Comfortable but secure
The “one-finger test” is crucial. Too loose and the helmet can slip off during impact; too tight and children will resist wearing it. Practice this test with your child so they understand what proper fit feels like and can check it independently as they grow older.
Signs of Proper Fit
Correct:
- Helmet stays level when child shakes head
- Child can see forward clearly
- Feels snug but not painful
- Stays in place during riding
- Doesn’t pinch or create pressure points
- Covers crown and upper forehead
Incorrect:
- Tilts back exposing forehead
- Tilts forward blocking vision
- Slides around on head
- Can be easily pushed off
- Creates hot spots or discomfort
- Sits too high on head
Growth and Replacement
Children’s heads grow quickly, and helmets need regular assessment:
Check fit every 3-4 months for children under age 5, and every 6 months for older children. Most helmets include adjustable fit systems that accommodate some growth, but there comes a point when a larger size is necessary.
Replace helmets after:
- Any significant impact (even if no visible damage)
- Five years of age (materials degrade over time)
- When fit system is maxed out
- Visible cracks or damage to shell or foam
- Straps are frayed or buckles broken
Choosing the Right Helmet
Types of Kids Helmets
Toddler Helmets:
- Flat back design
- Smaller circumference
- Lighter weight
- Fun designs for compliance
Toddler helmets are specifically engineered for younger children who may ride in seats, trailers, or on balance bikes. The flat back accommodates the proportionally larger back of a toddler’s head and allows them to comfortably rest against seats. Look for helmets weighing less than 300 grams to prevent neck strain.
Youth Helmets:
- Larger size range
- More ventilation
- Adjustable fit systems
- Sport-specific options
As children grow into independent cyclists, youth helmets offer increased ventilation for longer rides and more sophisticated adjustment systems. Some models are designed for specific activities like BMX, mountain biking, or road cycling, offering appropriate coverage and features for each discipline.
Multi-Sport Helmets:
- Round shape for all-around protection
- Suitable for biking, skateboarding, scootering
- Economical for families
- Typically heavier but more durable
Multi-sport helmets certified for both CPSC (cycling) and ASTM F1492 (skateboarding) standards work well for children engaged in multiple wheeled activities. While slightly heavier than dedicated bike helmets, they offer good value and eliminate the need for separate helmets for different activities.
Safety Certifications
Required Standards:
- CPSC: US Consumer Product Safety Commission (mandatory)
- ASTM: Additional voluntary standard
- Snell: Higher voluntary standard
Every helmet sold in the United States must meet CPSC standards, which test impact absorption, strap strength, and coverage area. Look for the CPSC sticker inside the helmet - if it’s not there, don’t buy the helmet regardless of price or appearance.
MIPS Technology:
- Multi-directional Impact Protection System
- Reduces rotational forces
- Premium feature worth considering
- Adds a modest premium to helmet cost
MIPS technology addresses rotational forces that standard helmets don’t fully protect against. Research indicates that rotational impacts can cause significant brain injuries even when linear impact forces are managed. Models like the Giro Scamp MIPS incorporate this technology at toddler-friendly price points. EN 1078 (European Standard): While not required in the US, this standard is roughly equivalent to CPSC and indicates quality manufacturing. Some premium European brands display this certification.
Features Worth Considering
Fit Systems:
- Dial adjusters provide precise fit
- Padding inserts customize comfort
- Removable pads for washing
- Tool-free adjustment
Ventilation:
- More vents = cooler but slightly less protective
- Fewer, larger vents balance cooling and safety
- Consider climate when choosing
Visibility:
- Bright colors increase visibility
- Reflective decals help in low light
- Some helmets include rear lights or mounting points
Visors:
- Helpful for sun protection
- Can limit upward vision
- Some models have removable visors
Top Recommendations
| Helmet | Value | Best For | Key Feature |
|---|---|---|---|
| Giro Scamp MIPS | Mid-Range | Toddlers | MIPS protection |
| Bell Sidetrack II | Budget | Budget | MIPS option available |
| Lazer Nutz | Mid-Range | Adjustability | Autofit system |
The Bell Sidetrack II offers exceptional value with its option for MIPS protection at a budget-friendly price point. For families concerned about cost, the non-MIPS version still provides excellent CPSC-certified protection while the MIPS upgrade remains accessible.
Essential Safety Gear
Required Equipment
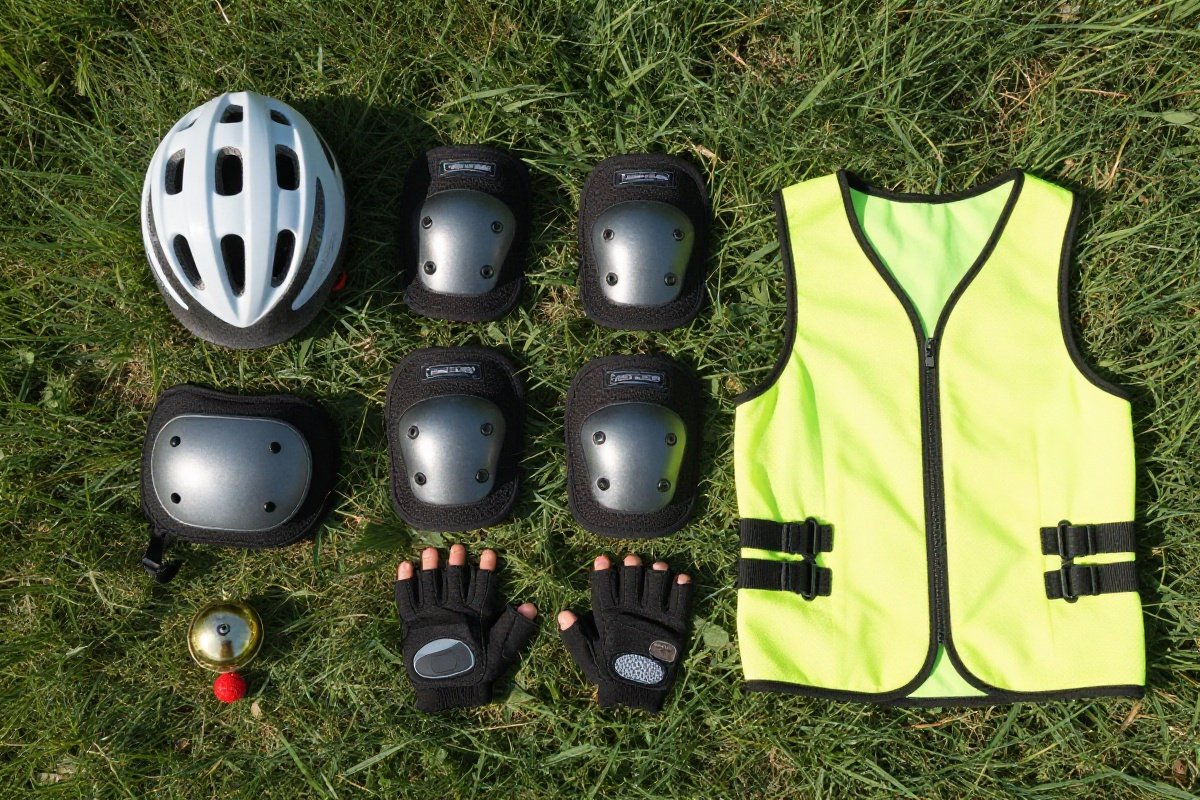
Helmet:
- Non-negotiable for every ride
- Properly fitted and certified
- Replaced after any impact
Establish a firm “no helmet, no ride” policy from the very first tricycle ride. Consistency prevents arguments later and establishes helmet-wearing as automatic as buckling a seatbelt. Teaching children about when they can transition to a booster seat reinforces this same habit of consistent safety equipment use.
Closed-Toe Shoes:
- Good grip on pedals
- Protect feet if foot slips
- Never sandals or bare feet
- Laces tucked in to prevent catching
Tennis shoes or athletic shoes work perfectly. Avoid shoes with smooth soles that can slip off pedals, and always double-knot laces or tuck them into the shoe to prevent them from catching in the chain or spokes.
Visible Clothing:
- Bright colors
- Reflective elements
- Weather appropriate
- Avoids loose, flowing fabric
Fluorescent yellow, orange, and green are most visible to drivers. Add reflective tape to jackets, backpacks, and shoes for additional visibility. In dim conditions, reflective material is 10 times more visible than non-reflective colors.
Recommended Additional Gear
Knee and Elbow Pads:
- Essential for beginners
- Important for skate park/trick riding
- Boosts confidence
- Reduces fear of falling
Protective pads significantly reduce scrapes and bruises during the learning phase. Children who wear pads often progress faster because they’re more willing to take appropriate risks without fear. Look for pads that fit snugly without restricting movement.
Gloves:
- Protect palms in falls
- Improve grip
- Prevent blisters
- Provide sun protection
In a fall, instinct causes us to extend our hands, making palms vulnerable to scrapes and cuts. Simple fingerless cycling gloves or even gardening gloves provide adequate protection for recreational riding.
Lights and Reflectors:
- White front light
- Red rear light/reflector
- Required for low-light riding
- Steady or flashing modes
Even if you don’t plan evening rides, lights increase visibility during overcast days or in shaded areas. Inexpensive LED lights that attach with rubber straps provide flexibility to move them between bikes.
Bell or Horn:
- Alerts pedestrians and other cyclists
- Required by law in some areas
- Teaches courteous riding habits
- More effective than yelling
Teaching children to use a bell when approaching pedestrians instills good cycling etiquette and safety awareness.
Eye Protection:
- Prevents debris and bugs
- Reduces glare
- Essential for higher speeds
- Prescription options available
Sunglasses or clear safety glasses protect eyes from insects, dust, and road debris. For children who wear prescription glasses, ensure they’re secured with a sports strap.
Bike-Mounted Safety Items
Flags:
- Tall, bright safety flags
- Increase visibility for small riders
- Especially important near parked cars
- Attach to rear wheel axle
Safety flags on flexible poles make small children visible to drivers who might otherwise miss them behind parked cars or bushes. Particularly valuable for riders under 48 inches tall.
Mirrors:
- Handlebar or helmet-mounted
- Helps check traffic behind
- Useful for older children
- Teaches traffic awareness
Rearview mirrors work well for children mature enough to use them effectively (typically age 8+). Younger children may find them distracting.
Baskets and Racks:
- Keeps hands free for steering
- Prevents handlebar dangles
- Properly mounted and secured
- Weight limits respected
Teach children to carry items in baskets or panniers rather than handlebar bags that can interfere with steering, or backpacks that can throw off balance.
Bike Selection and Fit
Choosing the right bike dramatically affects both safety and enjoyment. A bike that’s too large is difficult to control and dangerous, while one that’s too small can cause discomfort and limit skill development.
Balance Bikes (Ages 18mo-4yr)
Benefits:
- Teaches balance naturally
- No training wheels needed
- Light and maneuverable
- Builds confidence
- Develops spatial awareness
- Prepares for pedal bikes
Balance bikes revolutionized how young children learn to ride. By separating the balance skill from pedaling, children master the most challenging aspect of cycling in a safe, controlled manner. Models like the Strider 12 Sport Balance Bike feature adjustable seats and handlebars that grow with your child. Features:
- No pedals
- Adjustable seat
- Lightweight frame (ideally under 8 lbs)
- Low standover height
- Air or foam tires
- Handbrake (optional for older toddlers)
Selection Tips: Measure your child’s inseam and choose a bike with a seat height at least 1 inch lower than their inseam. This allows them to place both feet flat on the ground for stability. Children should be able to walk comfortably while seated and lift their feet to glide.
Pedal Bikes (Ages 3-6)
Training Wheels:
- Help with initial pedaling
- Should be temporary
- Raise gradually as balance improves
- Remove when child is ready
Training wheels serve a purpose but shouldn’t become a crutch. Children who master balance bikes often skip training wheels entirely. If using training wheels, gradually raise them over time so the bike tips slightly, encouraging balance development.
Key Fit Points:
- Child can touch ground while seated
- Can stand over top tube
- Handlebars within comfortable reach
- Can operate brakes
- Legs slightly bent at pedal’s lowest point
- Arms slightly bent when holding handlebars
The Schwinn SmartStart Bike incorporates child-specific geometry including narrower pedal positions and smaller grip diameters, making it easier for children to control.
First Pedal Bike Features:
- Single-speed or coaster brake
- Lightweight aluminum frame
- Chain guard to protect clothing
- Easy-to-reach handbrakes
- Adjustable seat and handlebars
- Stable, predictable handling
Youth Bikes (Ages 6-12)
As children grow into more confident riders, bike features become more sophisticated:
Gearing Options:
- Single-speed for beginners
- 5-7 speeds for varied terrain
- Twist or trigger shifters
- Gradual introduction to gearing concepts
Brake Types:
- Coaster brakes for young riders
- Hand brakes for older children
- Combined braking systems
- Regular brake adjustment and maintenance
Premium options like the Woom 2 Kids Bike feature lightweight construction, upright geometry for better control, and components scaled specifically for children’s smaller hands and shorter limbs.
Proper Sizing Guide
| Wheel Size | Approximate Age | Height Range | Inseam |
|---|---|---|---|
| 12” | 2-3 years | 30-38” | 14-17” |
| 14” | 3-4 years | 36-42” | 16-20” |
| 16” | 4-5 years | 40-46” | 18-22” |
| 20” | 5-8 years | 45-54” | 21-25” |
| 24” | 8-11 years | 52-61” | 24-28” |
Measuring for Fit:
- Measure inseam (more accurate than height)
- Compare to bike’s standover height
- Child should have 1-2 inches clearance
- Test ride before purchasing
- Allow some room for growth (but not too much)
Sizing Mistakes to Avoid
Too Large: Children cannot control oversized bikes safely. The temptation to “buy bigger for growth” creates immediate danger. A child who can’t touch the ground or reach brakes properly is at serious risk.
Too Small: While less dangerous than too large, undersized bikes are uncomfortable and can cause knee pain or poor posture. Children outgrowing their bikes need upgrades.
Neglecting Standover Height: Even if seat height adjusts properly, excessive standover height prevents children from dismounting safely in emergencies.
Teaching Safety Rules
Building safe cycling habits requires progressive, age-appropriate instruction combined with consistent reinforcement.
Progressive Learning
Stage 1: Controlled Environment (Ages 2-4)
- Empty parking lots
- Driveways
- Parks without traffic
- Focus on basic control
During this stage, children master starting, stopping, steering, and basic balance. Practice in completely traffic-free zones allows them to make mistakes safely. Focus on fun and confidence rather than rules.
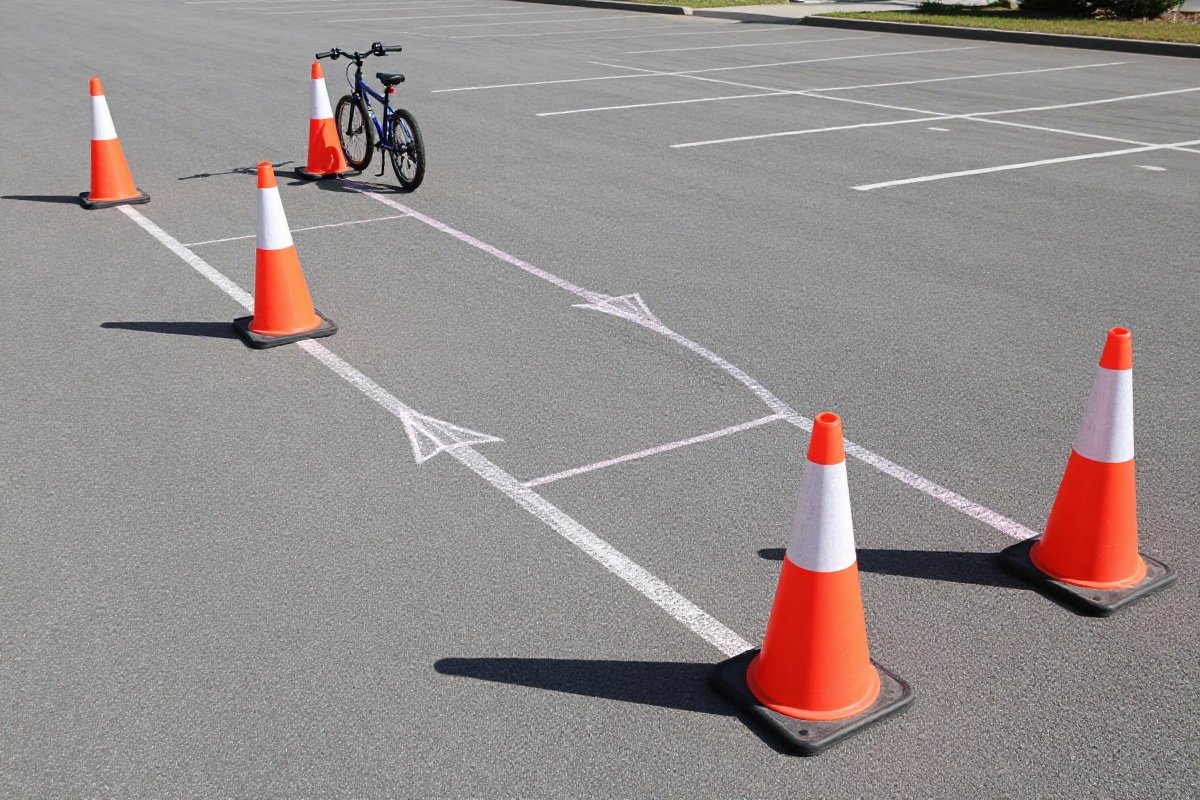
Activities for Stage 1:
- Follow the leader
- Obstacle courses with cones
- Starting and stopping games
- Slow riding challenges
- Turning practice
Stage 2: Low-Traffic Areas (Ages 4-6)
- Quiet residential streets
- Bike paths
- School grounds (when permitted)
- Introduce traffic awareness
Introduce the concept of looking for cars, staying to the right, and stopping at intersections. Model these behaviors consistently. Ride alongside your child, narrating what you’re watching for and why.
Stage 2 Skills:
- Looking left and right
- Recognizing stop signs
- Riding in a straight line
- Maintaining safe distance from curbs
- Watching for driveways
Stage 3: Regular Streets (Ages 6-8+)
- Neighborhood streets
- Supervised road riding
- Practice traffic rules
- Build independence gradually
Only progress to this stage when children demonstrate consistent safety awareness and bike control. Begin with adult supervision on every ride, gradually allowing independent neighborhood rides as maturity and judgment develop.
Stage 3 Skills:
- Traffic pattern understanding
- Hand signals
- Lane positioning
- Intersection navigation
- Hazard identification
Essential Rules
The Non-Negotiables:
- Helmet on every ride
- Obey traffic signs
- Ride with traffic flow
- Use hand signals
- Stay alert and visible
Traffic Skills:
- Left-right-left before entering street
- Make eye contact with drivers
- Watch for driveway traffic
- Use crosswalks when available
- Stop at all stop signs and red lights
- Yield to pedestrians
- Never ride against traffic
Detailed Hand Signals:
Teaching proper hand signals prepares children for eventual independent riding:
- Left Turn: Left arm extended straight out
- Right Turn: Right arm extended straight out (or left arm bent upward at 90 degrees)
- Stopping: Left arm bent downward at 90 degrees
Practice these signals in a parking lot until they become automatic. Initially, children may need to stop to signal, which is safer than wobbling while trying to signal.
Communication Skills
Verbal Cues:
- “On your left!” when passing
- “Stopping!” to alert followers
- “Car back!” to warn about approaching traffic
- “Clear!” when coast is clear at intersections
Visual Awareness:
- Scan ahead for hazards
- Check behind before moving left
- Watch for opening car doors
- Notice pedestrians entering path
- Observe traffic light timing
Setting Boundaries
Clear, specific boundaries help children understand expectations:
Beginner Boundaries:
- Ride only in driveway or park
- Adult must be watching
- Ask permission before getting bike out
Intermediate Boundaries:
- Ride on our street only
- Must wear helmet and shoes
- Back before street lights come on
Advanced Boundaries:
- Stay within marked neighborhood area
- Ride with buddy or sibling
- Phone check-ins required
- No major streets or highways
Post a map showing exactly where riding is permitted, and enforce boundaries consistently. For parents looking for creative ways to reinforce these rules, safety games and activities can help children internalize traffic awareness through play.
Common Hazards
Understanding and preparing for common hazards reduces injury risk significantly.
Driveway Dangers
The Risk:
- Backing vehicles
- Limited visibility
- Driver distraction
- Fast-moving cars
Driveway accidents represent a significant percentage of child cycling injuries. Drivers backing out often don’t see small cyclists, and children may not recognize the danger until too late.
Safety Measures:
- Stop at end of driveway
- Look for reversing lights
- Listen for running engines
- Make eye contact with driver
- Wait until vehicle stops completely
- Never assume driver sees you
Parked Car Hazards: Teach children to watch for:
- Brake lights indicating car about to move
- Exhaust showing running engine
- Driver in seat
- Wheels turned toward street
- Open or opening doors (ride at least 3 feet away)
Intersection Challenges
Teaching Points:
- Stop at all intersections
- Look all directions
- Wait for gap in traffic
- Make eye contact with drivers
- Follow traffic signals
- Use crosswalks when available
- Yield to turning vehicles
Four-Way Stops: These can be confusing for children. Teach them to stop, wait for their turn, make eye contact with drivers, and proceed cautiously even when it’s their turn.
Uncontrolled Intersections: Intersections without signs or signals require extra caution. Teach children to slow down, look both ways multiple times, and cross quickly when clear.
Road Conditions
Hazards to Avoid:
- Potholes and cracks
- Gravel and debris
- Wet leaves and painted lines
- Train tracks (cross at angle)
- Storm grates (ride around)
- Glass and sharp objects
- Standing water (may hide potholes)
Surface Transitions: The junction between different surfaces (pavement to gravel, sidewalk to grass) can catch wheels unexpectedly. Teach children to slow down before transitions and cross at a perpendicular angle when possible.
Weather Considerations:
Wet Conditions:
- Braking distances increase
- Painted lines become slippery
- Puddles hide hazards
- Visibility decreases
Hot Weather:
- Pavement can soften and grab tires
- Heat affects tire pressure
- Dehydration risk increases
Cold Weather:
- Watch for ice patches
- Leaves hide hazards
- Darkness comes early
- Numb fingers affect brake control
Pedestrian Conflicts
Sidewalk Riding: Many jurisdictions allow or require young children to ride on sidewalks, creating potential conflicts with pedestrians.
Courteous Sidewalk Behavior:
- Slow speed when passing
- Ring bell or call out warning
- Give pedestrians right of way
- Walk bike through crowded areas
- Dismount for steep driveways
Crossing Driveways: Teach children that driveways crossing sidewalks are still part of the roadway where vehicles have right of way.
Animal Encounters
Dogs: Dogs chasing cyclists is common. Teach children to:
- Stop and dismount if threatened
- Place bike between child and dog
- Avoid yelling or sudden movements
- Back away slowly
- Report aggressive dogs to authorities
Other Animals: Squirrels, birds, and other animals can dart into the path unexpectedly. Teach defensive riding that expects the unexpected.
Maintenance and Inspection
Regular maintenance prevents mechanical failures that can cause accidents. Teaching children basic bike care builds responsibility and ensures their bike remains safe to ride.
Pre-Ride Check
The ABC Quick Check:
- Air: Tires properly inflated
- Brakes: Test both front and rear
- Chain: Properly lubricated and tight
- Quick releases: Tightened and closed
Make this check routine before every ride. It takes less than two minutes and can prevent serious accidents.
Detailed Air Check:
- Squeeze tires - should feel firm
- Check for bulges or worn spots
- Inspect for embedded glass or thorns
- Verify valve stems are straight
Brake Check:
- Squeeze each brake lever
- Wheels should stop rotating
- Brake pads should contact rim cleanly
- Cables should move freely
- No squealing or grinding sounds
Chain Check:
- Should be clean and lightly oiled
- No rust or stiff links
- Proper tension (slight slack)
- Chain guard in place
Monthly Maintenance
- Check tire tread and pressure
- Inspect brake pads
- Lubricate chain
- Tighten bolts
- Check wheel trueness
- Inspect frame for cracks
- Clean bike thoroughly
- Test gears (if applicable)
Teaching Maintenance: Involve children in bike maintenance appropriate to their age:
- Age 4-6: Help with washing, applying stickers
- Age 7-9: Learn to check air pressure, clean chain
- Age 10+: Basic adjustments, tire changes, brake adjustments
When to Seek Professional Service
Immediate Professional Help:
- Bent frame or fork
- Wheels won’t spin freely
- Brakes don’t work properly
- Strange noises during riding
- Gears won’t shift smoothly
- Loose headset (handlebar wobble)
Annual Service: Even with regular home maintenance, professional mechanics should inspect bikes annually for issues that aren’t obvious to untrained eyes.
Storage Considerations
Indoor Storage:
- Prevents rust and weather damage
- Protects from theft
- Extends bike life
- Keeps tires from dry rotting
If Outdoor Storage Necessary:
- Use waterproof cover
- Protect from direct sun
- Secure with quality lock
- Bring inside during extreme weather
Further Reading
- Food Safety for Kids: Essential Guidelines for Parents
- Safety Games for Kids: Teaching Protection Through Play
- Child Safety at Home: Complete Babyproofing Guide 2026
Age-Specific Safety Considerations
Different ages present unique safety challenges requiring tailored approaches.
Ages 2-4: The Foundation Years
Physical Limitations:
- Limited peripheral vision
- Developing spatial awareness
- Impulsive behavior
- Short attention span
Safety Approaches:
- Very close supervision always
- Extremely controlled environments
- Short riding sessions
- Focus on fun and confidence
Ages 5-7: Building Skills
Capabilities:
- Better balance and coordination
- Beginning traffic awareness
- Following simple rules
- Increased endurance
Safety Approaches:
- Supervised neighborhood riding
- Explicit rule teaching
- Consistent reinforcement
- Gradual independence
Ages 8-10: Growing Independence
Development:
- Reliable traffic awareness
- Better judgment (but not adult-level)
- Peer influence increases
- Desire for independence
Safety Approaches:
- Defined boundaries
- Buddy system
- Regular check-ins
- Trust but verify
Ages 11+: Pre-Teen Cyclists
Considerations:
- Approaching adult capabilities
- Risk-taking behaviors emerge
- Peer pressure influences decisions
- May resist safety gear
Safety Approaches:
- Ongoing conversations about choices
- Logical consequences for rule-breaking
- Involvement in decision-making
- Leading by example
Whether on two wheels or four, keeping children protected requires informed, consistent parenting approaches that balance safety with independence.
Recommended Products
Giro Scamp MIPS
Best toddler helmetTop safety rating with MIPS technology.
What We Like
- MIPS (Multi-Directional Impact Protection System) reduces rotational forces
- Roc Loc Jr. fit system provides easy one-handed adjustment
- Flat back design compatible with child trailer and seat use
- Fun colorful designs appeal to children
What We Don't
- Higher price point than basic non-MIPS helmets
- Only two sizes may not fit all children in target age range
Bell Sidetrack II
Best budget helmetGreat value with optional MIPS protection.
What We Like
- Budget-friendly price under $35
- MIPS technology available on select models
- Integrated visor for sun protection
- Easy-adjust dial fit system
What We Don't
- Heavier than premium youth helmets
- Fewer vents mean less ventilation than high-end options
Strider 12 Sport Balance Bike
Best balance bikeBest way to learn cycling skills safely.
What We Like
- Teaches balance before pedals
- Lightweight frame at 6.7 lbs
- Adjustable seat height (11-19 inches)
- No training wheels needed
- Puncture-proof foam tires require no maintenance
What We Don't
- No brakes on Sport model
- Outgrown quickly by taller children
- Foam tires provide less traction than pneumatic
Woom 2 Kids Bike
Best premium kids bikePremium engineering for confident riding.
What We Like
- Ultra-lightweight at 11.7 lbs for easy handling
- Ergonomic design specifically for young riders
- Responsive dual-brake system with easy reach
- Low step-through frame for easy mounting
What We Don't
- Premium pricing at $399
- Limited availability with potential long wait times
- Children outgrow within 1-2 years
Sources & Research
Continue Reading
Explore more child safety content or browse our other categories.
Frequently Asked Questions
- How should a bike helmet fit a child?
- A properly fitted bike helmet is essential for protection. Follow these steps to ensure correct fit: Position the helmet level on the head, covering the forehead - about two finger-widths above the eyebrows. The helmet should not tilt back exposing the forehead or forward blocking vision. Adjust the side straps to form a "Y" shape meeting just below each ear. The straps should be snug but comfortable, with no slack. Buckle the chin strap and tighten until you can fit only one or two fingers between the strap and chin. When properly fitted, the helmet should not move more than about an inch in any direction when you push or pull it. Have your child shake their head - the helmet should stay in place without shifting. Check fit regularly as children grow quickly. Replace helmets that have been in any crash, even without visible damage, as the impact-absorbing foam may be compromised. Replace helmets every 3-5 years even without crashes, as materials degrade over time. Never buy a helmet for a child to "grow into" - a too-large helmet provides inadequate protection.
- At what age can kids start riding bikes?
- Children can begin developing bike skills at different ages depending on the type of bike and individual development. Balance bikes (bikes without pedals) can be introduced as early as 18 months to 2 years, allowing children to walk with the bike, then glide with their feet off the ground. These teach balance naturally without training wheels. Pedal bikes with training wheels are typically appropriate for ages 3-5, though many children who start on balance bikes skip training wheels entirely and transition to pedal bikes around age 3-4. By age 5-6, most children can ride standard bikes without training wheels. Key developmental readiness signs include: ability to pedal a tricycle smoothly, balance on one foot for a few seconds, steer and stop confidently, follow basic safety instructions, and have the physical coordination to manage pedals, steering, and brakes together. Always prioritize proper bike size over age - an ill-fitting bike is difficult to control and potentially dangerous. The bike should allow the child to sit on the seat with both feet flat on the ground for beginners.
- What safety gear do kids need for biking?
- Essential safety gear for kids biking includes: A properly fitted helmet - this is non-negotiable and legally required in many areas. Helmets reduce head injury risk by 85%. Closed-toe shoes with good grip - never allow barefoot or sandal riding. Bright, visible clothing - helps motorists see young riders. Reflectors and lights - required for dawn, dusk, or night riding; white front, red rear. Optional but recommended gear includes: Knee and elbow pads - especially for beginners learning to ride or those doing tricks. Gloves - protect hands in falls and improve grip. Bell or horn - helps alert pedestrians and other cyclists. Mirrors - help children see traffic approaching from behind. High-visibility vest - adds visibility in low light. For off-road or mountain biking, additional protection like full-face helmets, chest protectors, and shin guards may be appropriate. Water bottle - hydration is important for active kids. Remember that gear only works when used consistently - establish the habit of full safety equipment from the first ride.
- What are the most important bike safety rules for kids?
- The most important bike safety rules children should learn and follow include: Always wear a helmet - every single ride, no exceptions. Ride with traffic, not against it - bicycles follow the same rules as cars. Obey all traffic signs and signals - stop at stop signs and red lights. Use hand signals - left arm straight out for left turn, bent up for right turn, down for stop. Stay on the right side of the road - ride in the same direction as traffic. Watch for cars backing out of driveways - this is a common accident scenario. Look left-right-left before entering streets - make sure it's clear. Make eye contact with drivers - don't assume they see you. Use bike lanes when available - safer than riding in traffic. No riding at night without lights and reflectors - visibility is critical. No headphones while riding - must hear traffic approaching. One person per bike - no passengers unless bike designed for it. Keep both hands on handlebars except when signaling - maintain control. These rules should be taught progressively, with young children riding only on sidewalks or bike paths until they demonstrate mastery of traffic rules and decision-making.
- How can I teach my child safe biking habits?
- Teaching safe biking habits requires patience, consistency, and age-appropriate instruction. Start with the basics in a safe, controlled environment like an empty parking lot or driveway: Practice balancing, starting, stopping, and turning until these skills are automatic. Teach helmet habit first - no helmet, no riding, ever. Make it non-negotiable from day one. Model safe behavior - children learn by watching parents, so always wear your helmet and follow traffic rules. Use positive reinforcement - praise safe choices and correct unsafe ones calmly. Practice traffic skills progressively: Begin on sidewalks or bike paths away from cars. Teach road rules using pretend scenarios. Practice in quiet residential streets. Gradually introduce more challenging environments. Role-play common situations: What to do when a car is backing out of a driveway. How to handle an intersection. What to do if a dog runs toward you. Set clear boundaries based on skill level: Where they're allowed to ride. How far from home. When they need adult supervision. Make safety fun, not scary - emphasize that following rules lets them enjoy biking while staying protected. Review and practice regularly, especially after winter breaks or growth spurts when bikes may need adjustment.
Written By
Kid Sitting Safe
Our team researches car seat safety standards, crash test data, and real-world usability to help parents make the safest choice.
Related Articles

Child Safety at Home: Complete Babyproofing Guide 2026
Comprehensive guide to child safety at home. Learn essential babyproofing tips for every room, accident prevention, and creating a safe environment for your family.
Food Safety for Kids: Essential Guidelines for Parents
Learn essential food safety for kids. Guidelines for choking prevention, safe food temperatures, allergy management, and age-appropriate food preparation.
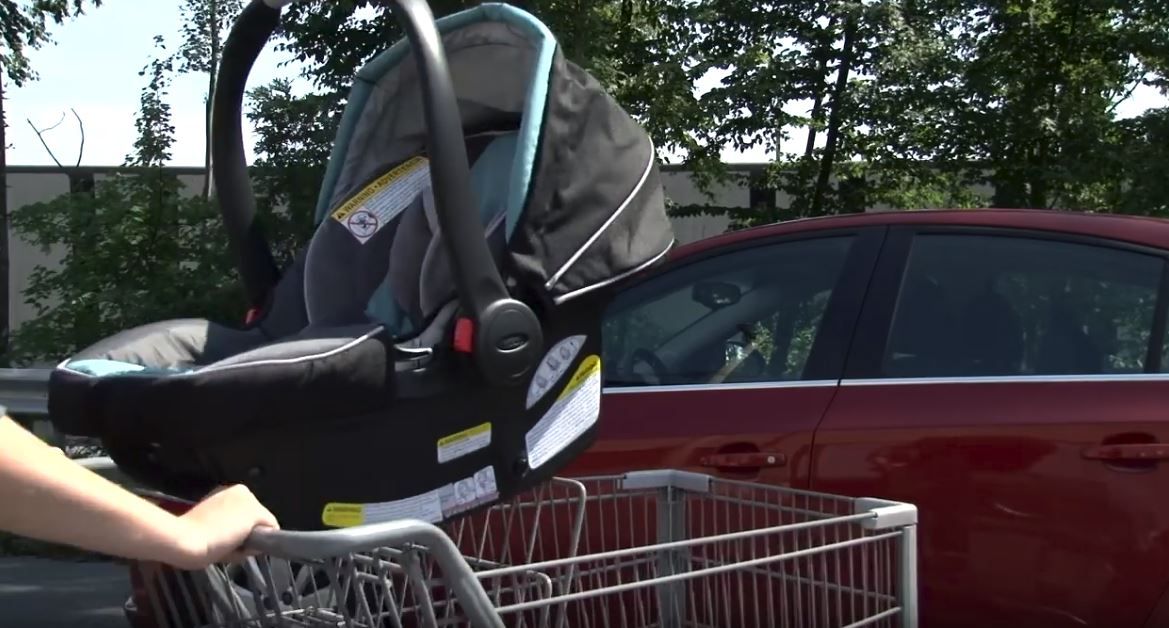
How to Put a Car Seat in a Shopping Cart: Safety Guide
Learn safe ways to use car seats with shopping carts. Understand the risks, proper positioning, and alternatives for shopping with infants.